Although i can't turn all my word pop up card
patterns i have made using scal into cricut design studio patterns
HERE is a repost of a lesson on how to make them (well sort of the same)
1. To make the main part of your card start on a matpatterns i have made using scal into cricut design studio patterns
HERE is a repost of a lesson on how to make them (well sort of the same)
2. Select the cartridge and the shadowing letter
3. select the size for this type of card 1" works best
4. weld all the letters
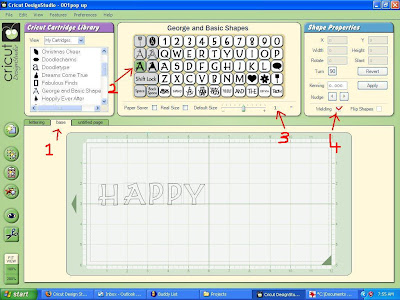
3. I put letters on one at a time this way i can control where they go (but i am not saying you can not place them all in one)make sure you weld all
4. placing then so as they over lap at least one part of the lettering above
5. making sure you are working on the center line
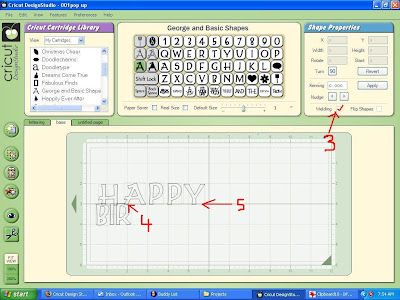
6. every letter above the center line has to be touching a letter below the line
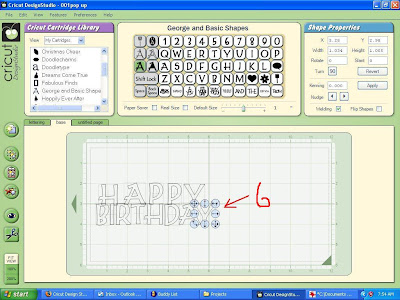
7. select the shapes on the card (you don't have to use this cartridge any of the font cartridges have a square of rectangle I THINK )
8. select a square or rectangle (cause you can turn the square into rectangle)
9. weld selected
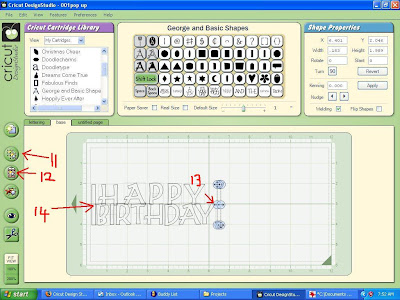
10. add one to the side of your lettering NOT TOUCHING the lettering
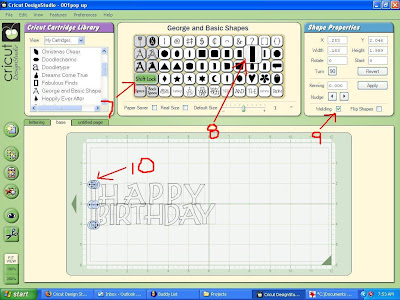
11. highlight that rectangle push copy
12. push on paste
13. and move too the other side NOT TOUCHING the lettering
14. so both sides look fairly even
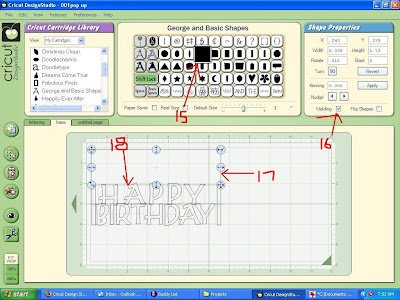
15. select a square
16. make sure it welded
17. make it into a rectangle
18. and HAVE it overlapping the top of the letters
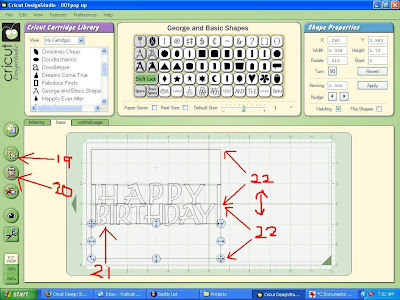
19. Highlight that rectangle push copy
20. push paste
21. Move down under the letters so it is overlapping the bottom letters
22. Have both the above and below the center line even
23. OK at this point i am worried that my lettering here will be too weak so i am going to fix it (left this is in show you what you can do )
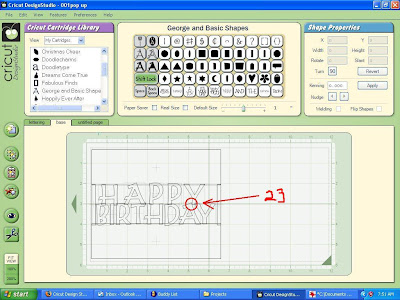
PLEASE NOTE THIS IS ONLY TO SHOW YOU WHAT CAN HAPPEN NOT NEEDED ALL THE TIME
24. select a rectangle
25. make sure it is welded
26. make it small enough and rotate it to fit in between lettering
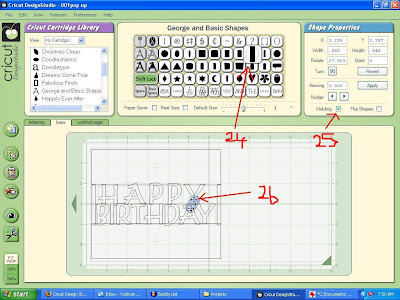
27. now i know that will be connected enough
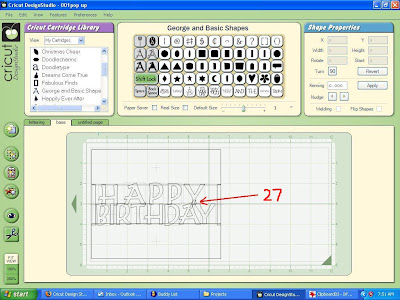
28. go lettering mat
29. select no shading
30. type the letters you need for you card
31. I put a cutting bock around this so i can have it cut out so i can use the negative part (which i used on the front of my card )OPTIONAL
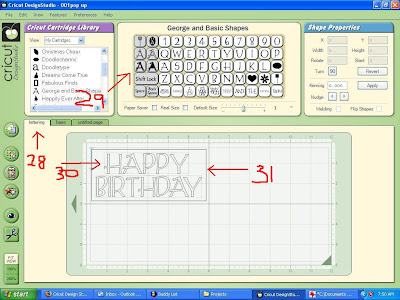
32. turn the view page off on lettering layer
33. get new mat
34. push on view
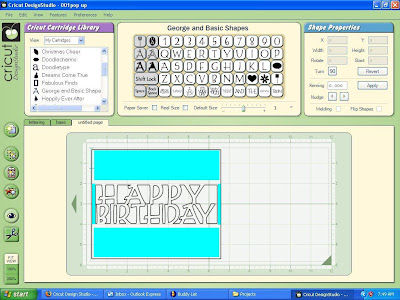
35. and you will see how the center base card will cut , it is at this time you will see if you have the letters right
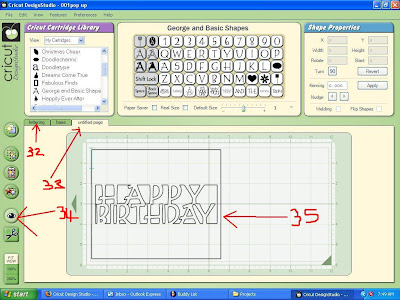
36. I make a little slit with scissors in card where the pink is
BLUE LINES are scored
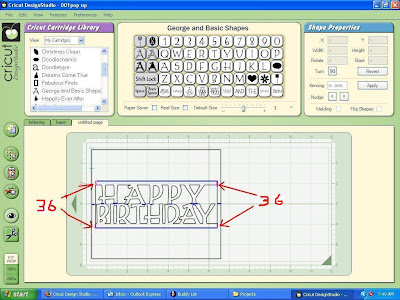
Tape goes on where the pail blue is ON BACK SIDE OF CARD and it gets taped in center of your card lining up the center fold


2 comments:
I am going to try this. Thanks!
I don't understand some of your instructions. What is " 28. go lettering mat
29. select no shading
30. type the letters you need for you card
31. I put a cutting bock around this so i can have it cut out so i can use the negative part (which i used on the front of my card )OPTIONAL "
How do you get a "cutting block" ? and...
32. turn the view page off on lettering layer
33. get new mat
34. push on view
35. and you will see how the center base card will cut , it is at this time you will see if you have the letters right
How do I turn off the page view? I selected a new mat, but I don't see where to "push on view". I never saw anything after that. There was no view of the center base card, much less how it would cut.
I would appreciate your help! Thanks!
Post a Comment