Scrap Factory Expanaion Packs

Tuesday, March 27, 2012

ZIGZAG bug with wagon ZING update

Week Six with having fun with the ZING 
This time I thought i would revisit a lesson i had on my blog years back as I really love this idea. Gives a great look to your project
Cut pattern out in two contrasting colours

lay them together (you can see that i have the white one behind but the top of the white is on the top of the blue.

Now holding the top wrap the blue to the back (you will notice that the first four zig zags are now in place)

Now you wrap the white to the back of the blue

Then the blue to the back and you will see the magic appearing

and the white to the back

Continue till they are both intertwined with each other

and here is the finished piece
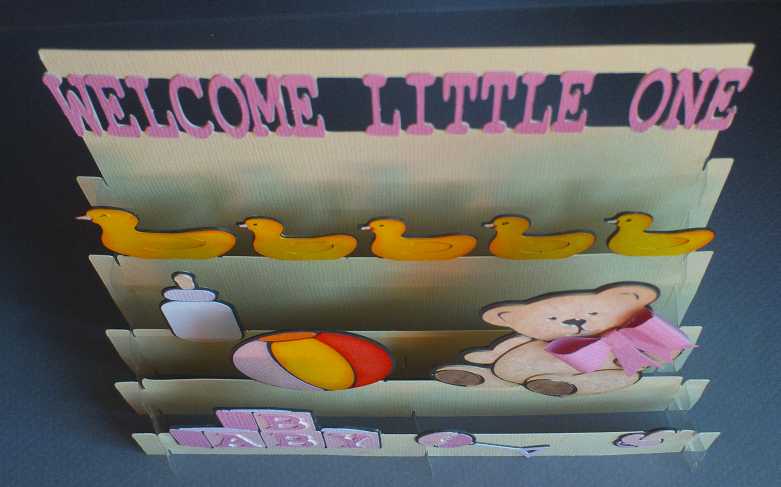
SEND ME AN EMAIL if you would like a copy of the svg file for this ZIGZAG

Here is the card I made this time with the idea 


Cards i have done in past with ZIG ZAG

TIP 
If you find you are getting a slight tear when the Zing begins each cut 
THE REASON your blade is out of the housing too far
(learnt this the hard way )
 
I am of to explore some more.
 If you live in Australia and New Zealand 
and wondering where you can get a KNK Zing 
SKAT KAT  is the place to find them

Saturday, March 24, 2012

Happy Birthday Frances

Here is another card I made using the  drop shadow shading on the font. Also Alota rubber stamp

Friday, March 23, 2012

Thursday, March 22, 2012

happy birthday ANDROID

Still having fun with the android fonts  they are soo much fun 
Used inkscape to design card then the Zing to cut

Wednesday, March 21, 2012

THINK PINK

I used the new release Alota bug stamp for this card 
cutting the base of the card using the Zing designing in inkscape

Tuesday, March 20, 2012

DROP shadow font inkscape LESSON

In update on my zing adventure last week HERE
I mentioned that i made the drop shadows in inkscape
 Here is the lesson oh what i found works good for me .
LETS BEGIN
 (click on pictures to see bigger)
Open inkscape type the word you want , then 
go PATH  object to path 
and then OBJECT ungroup.
and  PATH combine
this way it is easier to do this lesson 
Select that and do a control D and move the dulpicated one 
out the way .
I turned it into outline only just for the lesson so you can 
see it easier  and then you do control D
Now i use the arrow keys on my keyboard on the computer 
and i go one up and one right
then you do control D
the arrow keys on my keyboard on the
 computer and i go one up and one right 
then you do control D
the arrow keys on my keyboard on the
 computer and i go one up and one right
then you do control D
the arrow keys on my keyboard on the
 computer and i go one up and one right
You continue the
control D
the arrow keys on my keyboard on the
 computer and i go one up and one right
till you are happy with the depth you want the 
shadow to be
Once I have got it to the depth you select all those 
and then
PATH union
Here is the result
I then move the one i put aside on to check it
Here it is  coloured to see what it would look like when i cut
Into make the cut and cut on cutter (in my case the ZING)
HOPE this helps someone out there 
ENJOY
 
 If you live in Australia and New Zealand 
and wondering where you can get a KNK Zing 
SKAT KAT  is the place to find them

A slice here and slice there GIVE THIS RESULT (Zing update)

SLICEforms  that is 
MY fifth week of playing on the Zing was not soo much spent seeing what the Zing could cut but seeing and testing how it would cut layed images, so which  also meant spending lots of hours playing on INKSCAPE designing. I have always loved sliceform .  This week I thought i would make one or two  sliceforms of my own.
Making one for Neal for our Anniversary HERE  and one for the alota sample HERE.
I did not stop there and thought I would make a few more (hehehe) YES just a few!
Starting with the shadow effect cards. With a few noticeable ROBOTS there using the Droids font I found at DaFont and the Computer font found at dafont.


Thought that one looked a little dark so I also cut one out in grey and once I added the inkpad to the edges I was happier with it  (so i went back and added white inkpad to the black one which i did after photos were taken)


So next i thought oh i would love to do a sceen with it  but knowing that with all the others i have made over the years  and adding on pieces of coloured card for the colouring  it got top heavy and would fall back or forward so I thought i would give the patern making a bit more thought and  using the same idea i had for the Anniversary HERE  and one for the alota sample HERE, I would take that a bit further and put the bracking behind each layer. Which i was soo happy with the result and it worked soo well  (even if i do say so myself )
Used clear accitate for the side bracings so as it did not distracted from the look i wanted.


FOLDS flat for posting
After that turned out how i wanted it too. I then spent the next few hours  thinking of a way to turn it to a moon scape and this is the result


OK OK  I love Hot Air Balloons and it  just had to be a topic for  my sliceform cards. But this time this was harder as balloons are floating in the sky. So after a bit of thinking i came up with an idea of how to fix that problem but then found that even though the Zing has great fine cutting  it would be impossible for me to cut sheep and put in paddocks so I used a white gel pen for them and a little black for the legs


I was having still so much fun I then thought i would make a Easter card


 Then a BABY BOY card


 Could you guess I was going to say then I needed to make a BABY GIRL card


THEY FOLD FLAT
 TIP
When making my cut patterns and setting them up to cut if there is lettering that is going to be cut and if it is going to look OK with the negative I put a square or rectangle around it to use that for another card like i did while making the boy and girl card 
 Then I just added some images to make another card In this case i used the robots and ducks that i designed for the other cards 


TIP
Over the years I have cut things on  other cutters and most of the time it did not handle cutting the small things  but i found that the Zing handled it all  except the beaks of the ducks well it cut them but  they were soo tiny i dropped most of them when getting off the mat. SO here is the tip if you have this sort of problem  draw the thing (in my case it was the beaks)  in with a white gel pen and after dried colour with copic marker the colour you want .


I did say one or two sliceforms. 

I am of to explore some more.
 If you live in Australia and New Zealand 
and wondering where you can get a KNK Zing 
SKAT KAT  is the place to find them