Firstly
All of my patterns and instructions are covered by a Creative Commons license. This says you may share and enjoy the patterns, download them, make and give the cards to friends and family. You may not sell them for money.
You may modify the pattern as you like, but the resulting pattern will be under this same license.
Please give credit where credit is due.
There are soo many of the Animals cards in the series included
worm, teddy, wombat, penguin, dog, bee, bird, elephant, birdie, cat, chicken, turtle, cow, lamb, tiger, frogs, monkey, rabbit, horse, kanga, koala, ladybird, lion, lizard, pig, seal, giraffe, and rat
can be found through out my blog
1. Download and open the pattern you have in mind to change the wording
 2. So as you do not loose the original you will need a new copy of it saved as new name
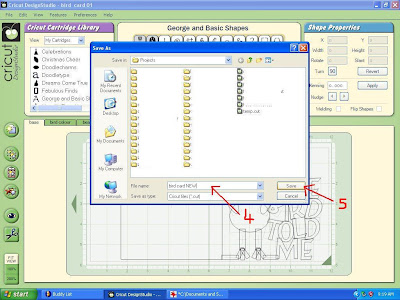
3. under file save as
 4. Type in new name
5. Push save
 6. highlight the old letters
7. push delete
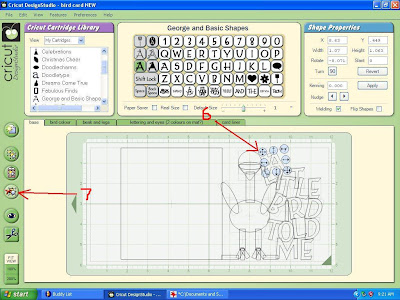 8. continue highlighting each letter (i put the letters on one at a time so as i have twist them to suit)
9. and pushing delete
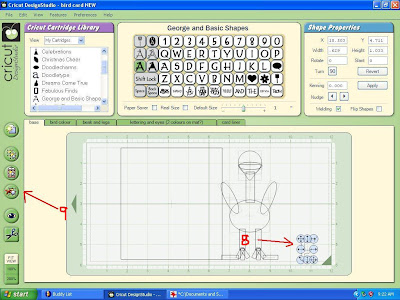 10. Select the shadow of the lettering you wish to use
11.type letter
12. check welded
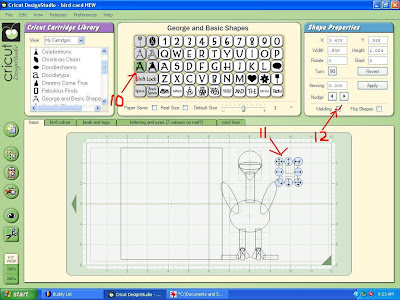 13. I like to put all letter on my mat (i type these on the computer keyboard H, enter/return, E, enter/return, L, enter/return, L, enter/return, 0 (on george cartridge i tend to use the number 0 than the letter O as i find it is much narrower and fits my cards better) , enter/return
14. Make sure they are all welded checked
15. Start with the bottom letter/word
16 making sure that it overlaps something on your card a little
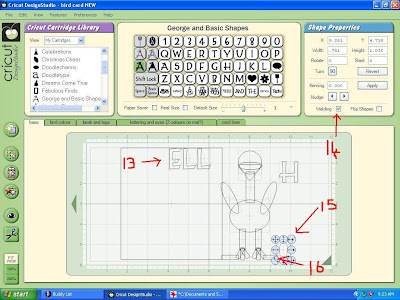 17. remember to make sure all letters are welded
18. continue to put the letters on at a time rotating them to suit what you want the card to look like
19.making sure that you over lap them with the other letters of animal a little
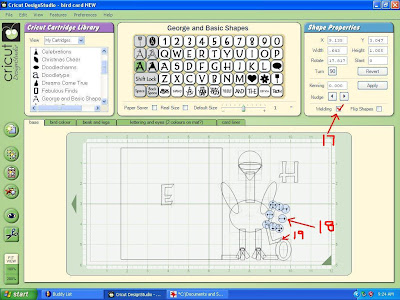 20. Every letter must touch the other letters and or the animal a little
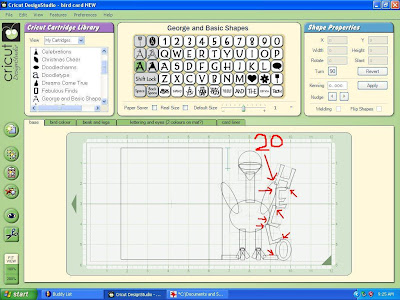 21. push preview eye
22. see that it is all cutting how you want it too
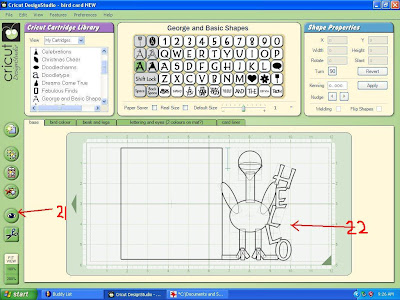 23. When it is all how you want . You need to change the top lettering , go to lettering mat
24. see the lettering for the old card
25. highlight
26. and push delete
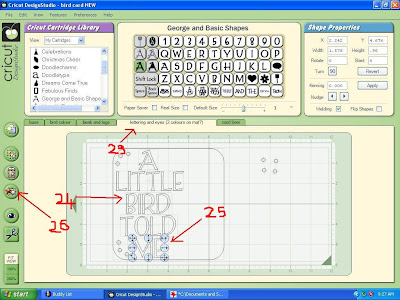 26. continue highlighting
27. and pushing delete till all old words are gone
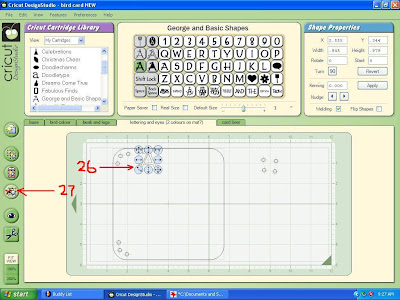 28. unclick shadow
29. type new letters
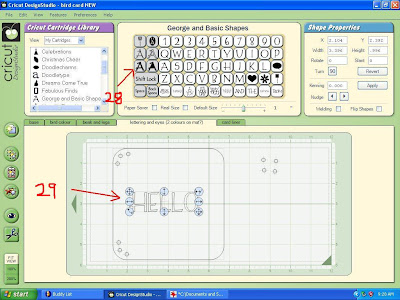 30. Save (do this often throughout the changing )
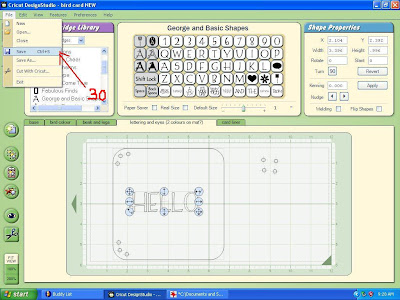 31. back to base mat and check to see if the back of your card is still going to fit your card
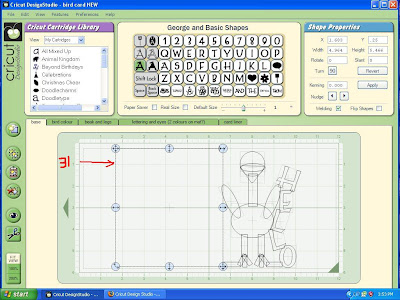 32. use the straight arrow moving key move across so it sits over the lefthand edge of the design
33. In this case there is going to be much to big of a space in the backing of the card
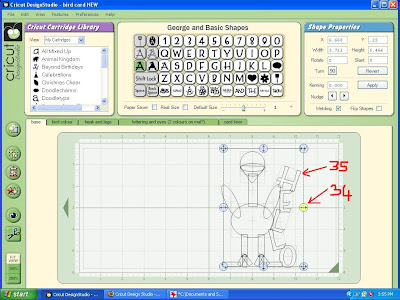
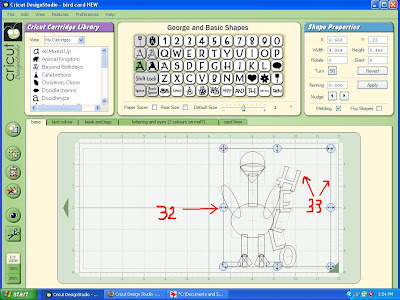 34. use the straight resize arrow
35. so it suits the size of the front of your card
 36. using the straight moving arrow move back onto place on the left hand side of your design
37. making sure it overlaps the design in at least two points
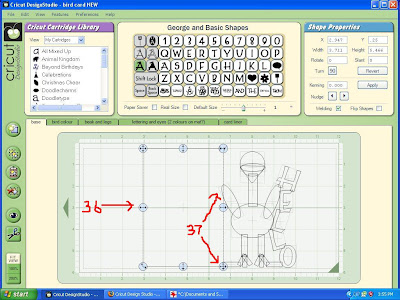 39. click preview eye and check again that all is looking right (save again )
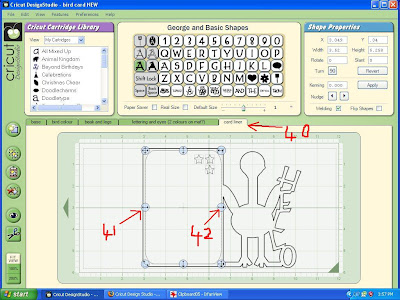
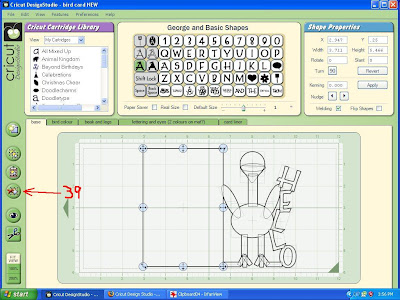 40. go to card liner mat
41. using straight moving arrow move into right place
42. using the straight sizing arrow make it fit the card (save again )

4 comments:
THANK YOU! You are wonderful to teach us novice buggers!
I love the way you explain each step and number them , but I would like to be able to print them off and put them in a book (only for myself, of course) so i don't have to keep looking them up on the computer.
How can i do this? Each time I try, I only get the first 3 pages of the date. like this one with the turkey.
Also, thank you for posting your Ideas and patterns. they are very helpful.
Shirley
You are completely overwhelming me with your creativity and knowledge. Thanks for sharing with those of us who are D.S. Challenged.
Linda Martin
Is there a cut file for these wonderful cards.
Thanks for sharing.
Linda Martin
bubbielcm@bellsouth.net
Post a Comment