2. Nothing highlighted here for the top layer letters

3. Start on layer one mat
4. Nothing highlighted
5. Size of lettering you want (this on is 3" letters (I personly dont change size after it is placed on the mat as it makes it too hard to shadow))

6. I add my letters one at a time so they are easily moved when constructing
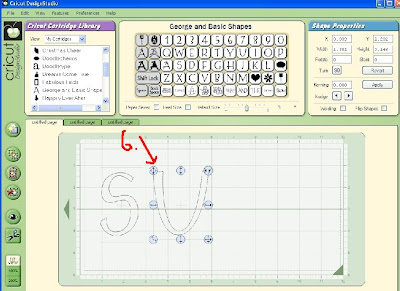
Add all the letters so thwy are all seperate letters
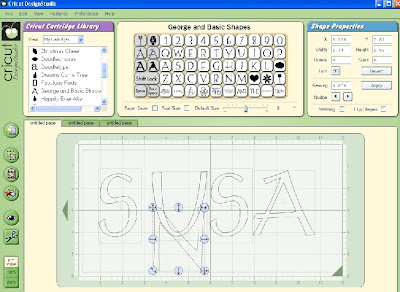
7. Now go to next layer mat
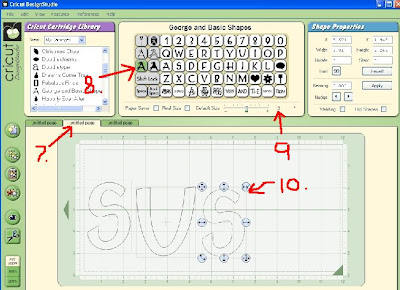
8. highlight the matting letter
9. Keep the default size the same in this case 3"
10. Start adding the letters adding them all seperately
11. Now you can start moving the letters in to the way you would like them
12. Making sure they are all marked at welding
13. you can even rotate them as you are overlaping them for fun effect
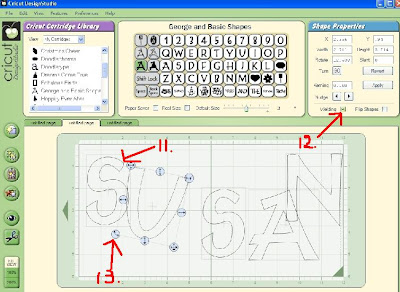
Continue arranging them
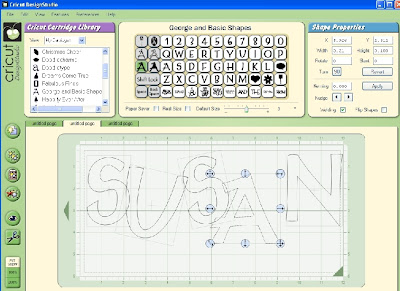
14. REMEMBERING to make sure you are welding each one
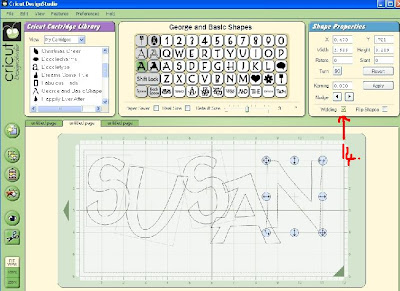
15 now push preview (oh yes does not look the best at this stage but you will know what is NOT welded but the coloured letters when they ARE welded they will be just out line ) Now this shows a preview of ALL layers of mat
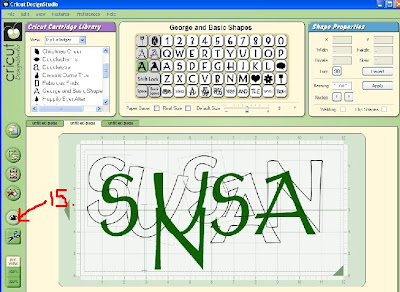
16. now go to first layer again
17. Right click you mouse on the mat and the dialog box will come up . Click the "include page in preview" to off so the tick disappears
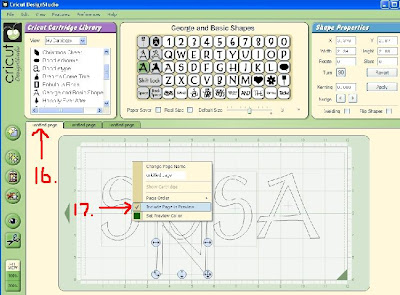
18. now go back to second layer
19. And click preview again. You should get an idea of now what is conected
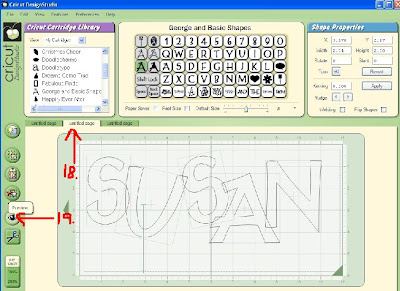
It wil look like this
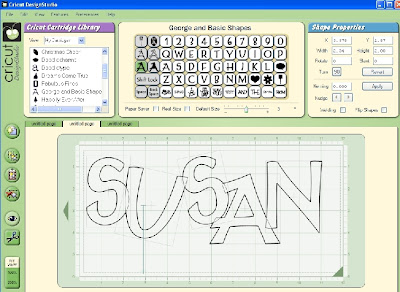
20. Now if you go up too view
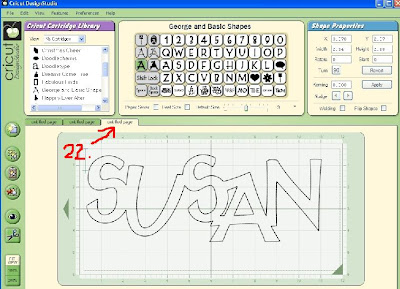
21. and in the dialog box click on the "Keep preview as mat background"

22. Click on the 3rd layer . YOU will now see the CUT only view of layer 2
23. Time to go back to first layer
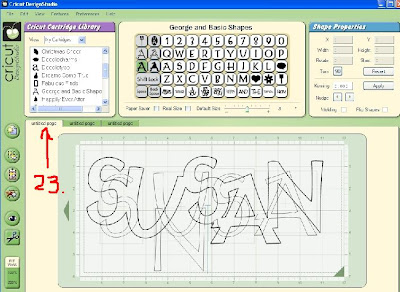
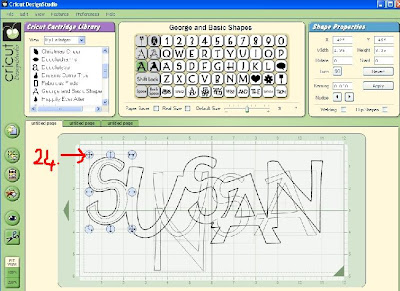
24. Start arranging the letters over the top of the background preview you have turned on
25. REMEMBERING the one that you rotated you have to rotate to fit on the background preview.
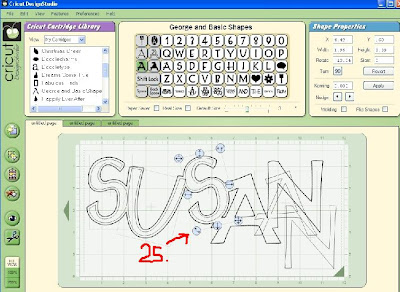
When all letters are on (i was not happy with mine as the top letters did not over lap enough to weld , so other than starting the instructions again i thought i would say you can go back to second layer and move the letters closer together and push preview again )
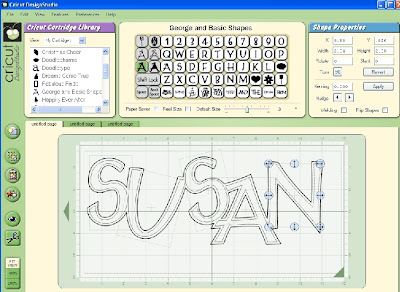
26. remember to have welding clicked on all these letters too
27. i was not happy with mine as the top letters did not over lap enough to weld , so other than starting the instructions again i thought i would say you can go back to second layer and move the letters closer together and push preview again
28. Back to the top layer just mover the letters back in the right placement (because of the no 27.)
29. Easily done by just moving them to fit over the preview background again
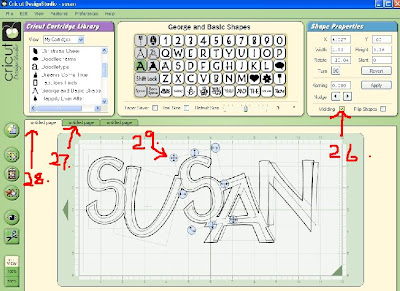
30. REMEMBER the welding on everything
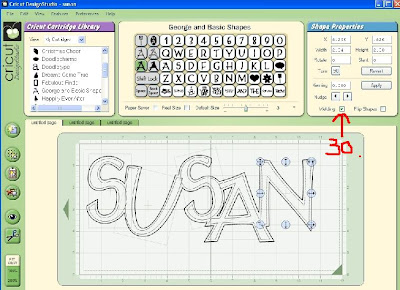
31. Now on first layer
32. Right click you mouse on the mat and the dialog box will come up . Click the "include page in preview" to ON so the tick appears
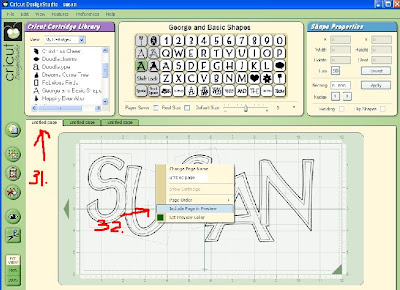
33. Go back to third layer
34. Click on the preview again
35. and you will now see if the top letters are all going to cut together
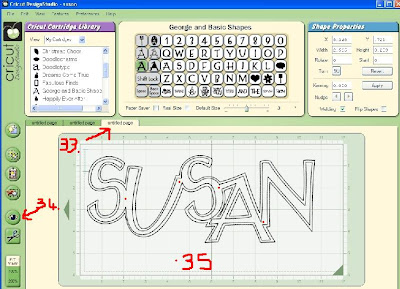
36. this is a view of the first layer only witht he second turned off
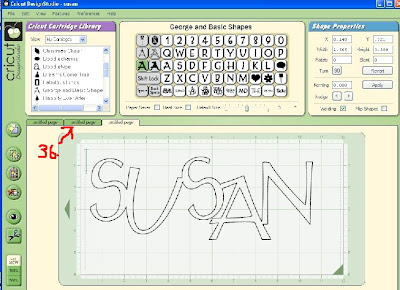
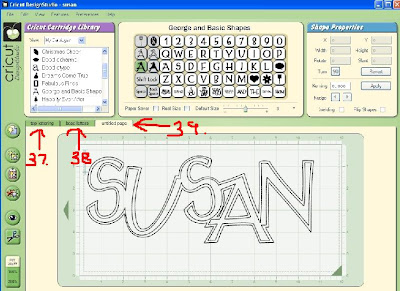
37. Now rename the first as "top layer"
38. the second as "base layer
39. and this remains untitled and i leave it there just for checking purposes

12 comments:
Susan:
First, I just want to say that I love all the work you've done and how generous you are with your time and talent. The cards you've been making the CDS are fabulous.
I just have a quick question. Do you really need the third mat to previewing. I haven't been having a problem previewing layers from an existing mat so I'm wondering what the difference is.
Thanks!
No you dont need the extra layer but it comes in handy when you are making very very compilcated as this layer for viewing you can see where it is going to cut
Thank you for all your hard work. You are a very talented person. I just wanted to let you know that I used your tips for welding and shadowing today and they were great. Thank you very much for the patterns and classes.
Thank you so much for this info!! I was trying to make a shadow in my cds the other day and I finally gave up! I hand cut it instead. Hopefully I will be able to do this now!! thanks again!
Wow, I've been doing things the hard way, wish I would have visited sooner! Thanks for the great tip!
Thank you so much for sharing your expertise with us. I have been thinking about the design studio but the sample seemed so complicated and the trouble perople are having put me off, but you have obviously got it to a fine art and with your instructions I am sure I will be able to do this!
Thanks again, you are truly an insporation
Thank you, thank you, thank you for this post!! It was SO helpful! I never would have figured out that whole "keep as background" thing without you! I just finished my first welded, shadowed title thanks to you. Hopefully I"ll be a little faster the next time!
Susan,
I for one want to thank you so much for all your patterns and for your tutorials because I have no idea how to do this and with your help I think I might just understand how to do it....we all owe you big thank you for all your help!
Carol
I am new to using the cricut and couldn't figure out how to make a "whole" word! This was just the tutorial I needed and now I can weld away. Thank you for all the great card ideas and designs. Thank you for all the time you put in!
You make it look so easy. I don't think I will ever be able to do those things.
Thanks for your tutorials.
I am going to try, however.
Thank you so much. You are Brilliant! I have always lurked but never have put any of your tutorials to work. Actually I was so intimidated! Today I decided to give it a try. Perfect instructions. I hope some day I will have as much knowledge as you. Keep up the GREAT work! I really and truley appreciate it!
THANK YOU!!! I have been trying to do this on my own for 2 weeks now. You have no idea how happy you have made me:)
Post a Comment