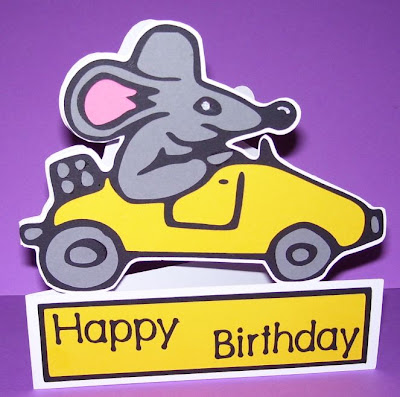
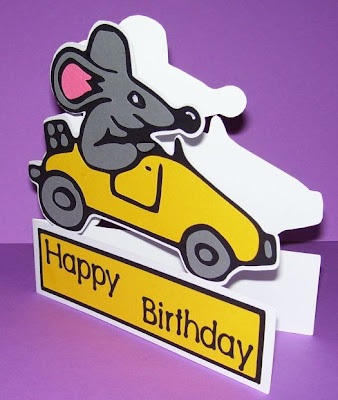
This is another variation on yesterday posting
Part 1 PLUS BONUS turning it into stand up card

 I found that with the lesson part one is ok unless your mat was too small or you wanted to do other things with it like make extra shadowing. Here is what i do for that
it is just a few extra steps but soo easy
**________________________________________________________________________**
On part one i added a red line as where you work down to and then move to this part
Now you select each colour section (one colour at a time)
 Go option and group
 To the next colour
 Go option group for all of the different colours
 Highlight and copy the first colour (base)
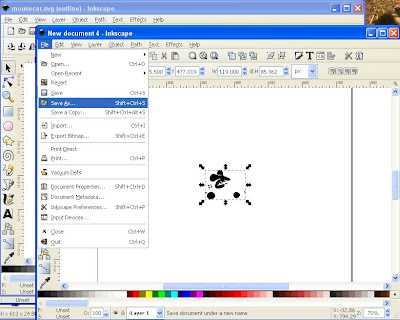
 Get new document
  And paste
 File save as
 save as base ------.svg then close that one
  now click and copy next colour
 open new document paste , file and save as
 best to save this as a (colour)+name of thing.svg then close
 go to next colour and copy
 open new document paste , file and save as
  best to save this as a (colour)+name of thing.svg then close
 go to next colour and copy , open new document paste , file and save as
 best to save this as a (colour)+name of thing.svg then close
 NOW to sure cuts a lot open , file, import improt BASE make it the size you want
 Now file import One of the colour layers
 You have to adjust the size over the top of the base and leave it there for NOW
 Now file import One of the other colour layers
 adjust the size over the top of the base and leave it there for NOW
 Continue those sets till you have them all looking the right size
 Move them all now around your mat so as they are in spots on your mat so you can put the card on your real mat in place so as they cut
(Please note that i have only a baby cricut and i will not have room for all pieces so i now have to move the base to new mat)
Highlight base if it does not fit copy and cut from this mat
 So your mat is ready
 Save this mat as ---------.scut
 Open new project and paste base it will paste the same size as you cut it from other mat.
then save project as ---------base.scut AND NOW READY TO CUT OUT .
 Bonus stand up card
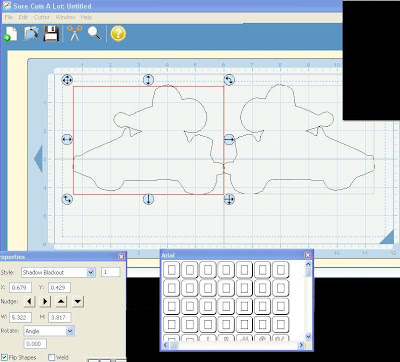
after i cut that out i decided that it needed to go on stand up shape card so i used the base
pasted it onto new project and made shadow (1), moved that to the right hand side so as it met at the center line,weld button, copied, pasted, weld, flip and lined it up with the one on the right side on the left side of the center line (so they slightly over laped

added a retangle along bottom under the image slightly overlapping and weld
(
please note in this one i had to slight rotate the bases so as the 4 wheels touched the rectangle. I used the rotate degrees for this NOT free hand that way i would then make sure they were both the same )  CUT added mats to the rectangle and added words enjoy
 THESE are not as hard as it looks they are easy it just looks hard as there are soo many pictures BUT i had to do as many pictures as i could so i could show every step PLEASE don't be put off by the size of the blogging of the lesson it is quick

 I found that with the lesson part one is ok unless your mat was too small or you wanted to do other things with it like make extra shadowing. Here is what i do for that


6 comments:
Hello Susan,
i would like to thank you for your great lessons with inkscape. They are so easy to follow just like your lesson on how to fix the timedate. Because of your lessons i purchased scal today (they should give you some povision for your enabeling) you are really the best.
thanks for sharing,
Mariët (from Amsterdam, Netherland)
Thanks again Susan, your lessons are great!! I purchased SCAL last week but haven't had time yet to really play with it. This sure helps a lot.
I've just started to step in your footsteps and make my own lessons for my mum. She is is complete computernewby and would love to work with the Cricut software, but has to be coached and reminded every step of the way. Seeing your help lessons made me see how easy (loads of work though) it is to help her without having to be there.
Susan - Thank you for you tutorials and all of the work you put into these so that others (like me) can benefit from your knowledge!
I really do appreciate all that you do for us!
Susan, your tutorials just blow me away. It is the only way I can learn how to do computer stuff - if I can just see the actual screen and exactly what button to push. Unfortunately, I have been getting nothing done around here for days because I can't quit playing with my new SCAL. It makes my little Cricut feel brand new. I'm still struggling a little bit to get it all but your videos make all the difference. Thank you for all your hard work.
Sue
Great tutorial, but even cuter card! Would you share he .scut file? That mouse/rat is cute! lkryb@bex.net
Thanks for your great tutorials. I have been looking for info about cleaning up dingbat fonts as I just could not work it out. Looking forward to trying out your ideas.
Post a Comment