Scrap Factory Expanaion Packs

Showing posts with label robotz cartridge. Show all posts

Tuesday, November 08, 2011

Metal art ROBOTZ for my hubby

Today I am here to show you all the 
Robot from the Robotz cartridge (with altered arms)
That I made for my Hubby. 
The robot is 9.5" tall .
I cut it out in white card stock  then I put on
the chipboard parts for eyes mouth and so on 
then  I made up the parts of robots then I did 
the metal tape work on it . Added a clock 
in the tummy and used black half pearls 
for the numbers
HERE is the youtube that got me hooked on metal tape
Even though I only have the baby cricut  I can still 
make bigger cuts for the 3D just by adding a few extra 
joins. The red one is the size you can make with baby cricut 
with out joins and then the metal one had two extra joins  on 
the baby cricut

Sunday, November 06, 2011

Metal art pen holders ( for the men)

To go with the cards I made the boys I also made
them pen holders for the desks
Using robotz and everyday cricut cartridges
and metal tape work


Monday, August 01, 2011

Before Aluminum tape and After Aluminum tape

Will i make use on metal tape on anything in house?
YES my hubby had this cigar box that he had put a
lock on so the other day i thought hmm that is
next thing.

Here is the result after I had taken it for a few
hours


managed to find a place
locally that sold it on line (Tapes on line)

Sunday, July 31, 2011

Robot on my tin too Aluminum Tape is addictive

After making the robot card and seeing how that turned out.
I knew it would be just perfect for one of the tin cases like i covered
last week as i still had a few left undecorated .
Here is the result


managed to find a place
locally that sold it on line (Tapes on line)

Tuesday, March 22, 2011

BLUE WHITE Robotz

Yesterday I showed a robot that I made
cut at 3"
Today I made a second one with a little
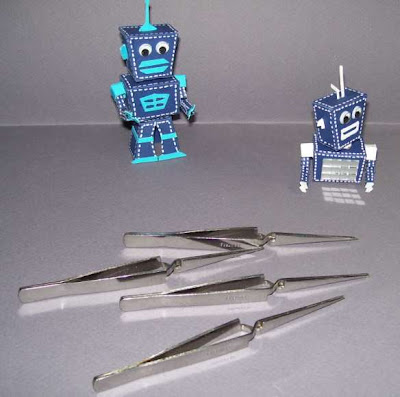
difference . Using my favorite tools reverse tweezers
these are easily put together , no more trying to
put my fat fingers in to hold together while the glue
dies


Good thing is it hold a long side together all way long
And remember i said a little difference, well here it
is . Between there body parts are magnets


and they just click together

Was surprised at how strong the magnets
are I can not hold head closer than this
or the body jumps up to the head
I used tiny adhesive mirrors on the front


With the magnet i can put the body in any direction

And here is my two little friends

Monday, March 21, 2011

BLUE BLUE Robotz

OK been back from holidays in over a week now
so i have finally made something to show on my blog
(guess i was still in holiday mode)
This Blue Robotz was cut at 3" (yes 3")
I read somewhere on the net that they 3D robots are
really only able to be put together if cut at a bigger size (5"plus)
I guess that is cause it is hard to get fingers in to glue the pieces together
These are reverse tweezers and the best tool to have they
help make all 3D things no matter what size you cut them
way smaller than my fat fingers.
Once again I have made my own pattern for the arms
as i don't like the arms on the cartridge.


Friday, February 04, 2011

PART TWO Have you ever been told..............

YEAH YEAH my post man came and brought my
Action Wobbles to me .
Soon as i seen people using these Wobbles my first
thought was to use them to put the robot together
And it worked the way i wanted and imagined
except i had to add one little thing to back and
front of legs (see below)


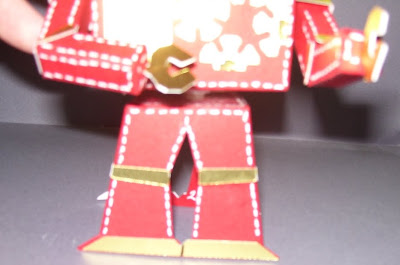
Using the Action Wobbles i added to the legs of the body


Trimmed of the excess sticky flush with the legs


Add to wobble to head and cut away excess
sticker flush with the head


OH NO !! I had to add a little stopper on back and
Front of top of the legs so the body would stand up and
still wobble


Be sure to check out this quick video of my Little Red Robot


THINK he sure did pull himself together
and that is how i wanted it to come together

!!!!!!!!!!!
Those who know the cartridge will notice
the arms of the robot is completely diferent to the
pattern . Be sure to let me know if you would
like me to do instructions on how i do these an easy way.

Thursday, February 03, 2011

PART ONE Have you ever been told..............

to pull yourself together ?
For the past 4 days I keep telling this robot
too.

I used the gypsy to hide the hole on the top
and bottom of the body and legs and head
Cut at 6.20 inches on 6"x 12" machine
Be sure to return tomorrow to see if this robot is still
in pieces (hope not as 4 days of seeing this poor robot
like this is sad enough)
!!!!!!!!!!!
Those who know the cartridge will notice
the arms of the robot is completely diferent to the
pattern . Be sure to let me know if you would
like me to do instructions on how i do these an easy way.

Monday, January 03, 2011

Saturday, December 04, 2010

Gears hide things "Happy Birthday"

Today using the tim holtz gear die,
my own gear pattern and the robotz cricut cartridge
I made a card to hold a gift card

Pulling out the side gear shows the gift card

Sliding easily in and out