Let me first start by saying PLEASE don't let the amount
of photos in this post put you off making it I have done that
many photos so as not to miss a step BUT if you were at the
webinar you will know that it takes less than 1/2 hour to make
once you get the hang of it. And will be once the WEBINAR is
post to watch that as well.
PART TWO
how to make your OWN Sliceform Display card
(click on photos to make them bigger)
LET's BEGIN
First off we need a 5" square . I put mine at
X 6.5 and Y 0.5 that way i can use the grids on my
mat to my advantage later
Now COPY
And EDIT Paste in PLACE twice so you end up with 3
square the same size
Then to make it easy I do a right click on the layer name
and go TO EACH IT's OWN
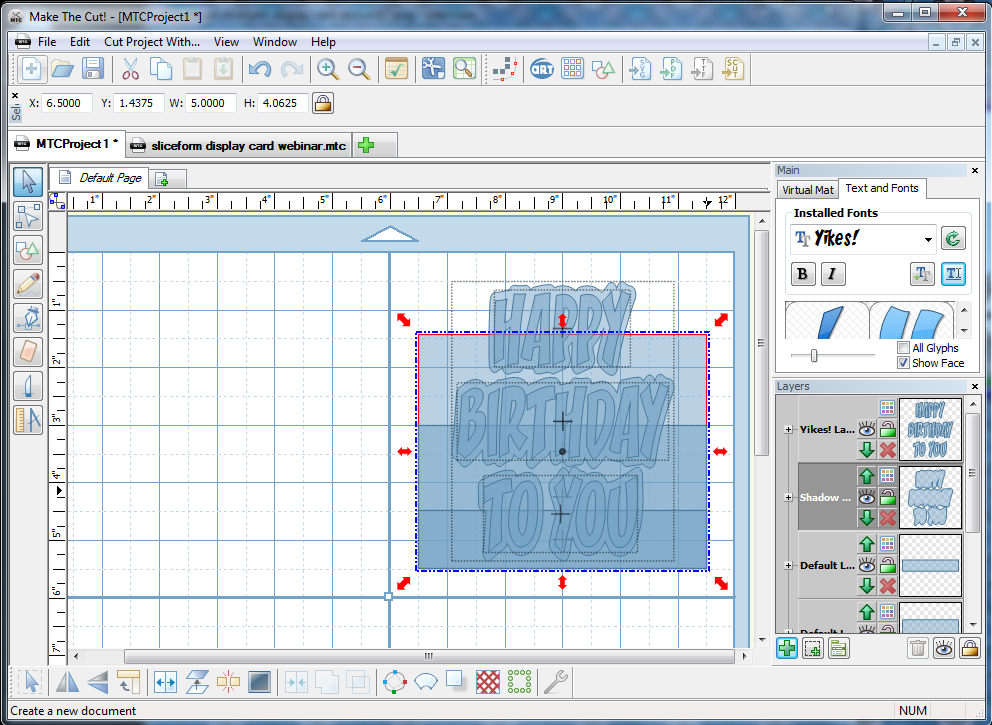
I then bring in the wording I want
(I used YIKES from dafont.com for this )
with the words selected i right click and go to
SHAPE MAGIC
Then SHADOW LAYER
Found a shadow size that looked good 0.1225
and APPLY BLACKOUT to get rid of any
stray parts like at the R and T
With both lettering and shadow selected to now put over
the top of our squares
This is where the grids on the mats are handy you resize
your wording so that they inside the .5" grid on each
side and make it tall enough on the card to suit
Now select one of the squares and pull the top middle arrow
downwards till it is about half way between the TO YOU Shadow
Now select one of the squares and pull the top middle arrow
downwards till it is about half way between the BIRTHDAY Shadow
Now select the last square and pull the top middle arrow
downwards till it is about half way between the HAPPY Shadow
Select only the Shadow layer and do a split
Now select the TO and the YOU and the Small square
(holding down shift key while selecting them )
With all 3 selected do a WELD
Select the Birthday shadow and holding down the shift key
select the middle square
And do a WELD
Select the Happy shadow and holding down the shift
key select the big square
And do a WELD and right clicker on the layer name
do a TO EACH ITS OWN
Now you need to bring in a square(rectangle) I make this about
0.05 wide
With that selected do a COPY
And PASTE IN PLACE
You take that pasted one and move to the 1/2" grid line on the left
side of the card and have it so it is a 1/4" up from the bottom.
With that selected do a COPY and PASTE IN PLACE
That new one holding down the control key on keyboard
use your up arrow keys and move it up so that the bottom of it
is over the smallest card piece by 1/4"
In this order
Select both of them. Do COPY , then JOIN, then
put on own LAYER and close the eye of that one and go back
to the layer in which you are working on originally
Now go PASTE IN PLACE and deselect then just select the top
on and using the control key and the Arrow keys on your keyboard
move it up till it is 1/4 down from the side of the birthday part of the card
In this order
Select both of them. Do COPY , then JOIN, then
put on own LAYER and close the eye of that one and go back
to the layer in which you are working on originally
Now go PASTE IN PLACE and deselect then just select the top
on and using the control key and the Arrow keys on your keyboard
move it up till it is 1/4 down from the side of the Happy part of the card.
then select both them and do a JOIN
Turn back on the other two layers you turned the eye off
and select all of them on that side of the card and do a
COPY
NOW select all of them and the three card bases and to a
MIRROR (yes the wording is back the front DON't PANIC)
Now a PASTE IN PLACE
You now have the little parts on both sides
Select everything on that side and do a mirror
this will bring your wording the right way and you
now have the parts for making the slits evenly on both sides
Here is now I like to make sure everything is on its own
layer and I turn of all the eyes
Selecting the three pieces for each layer the wording
shadow and the two lots of rectangles on the sides that
match. select both the rectangles and do a join .
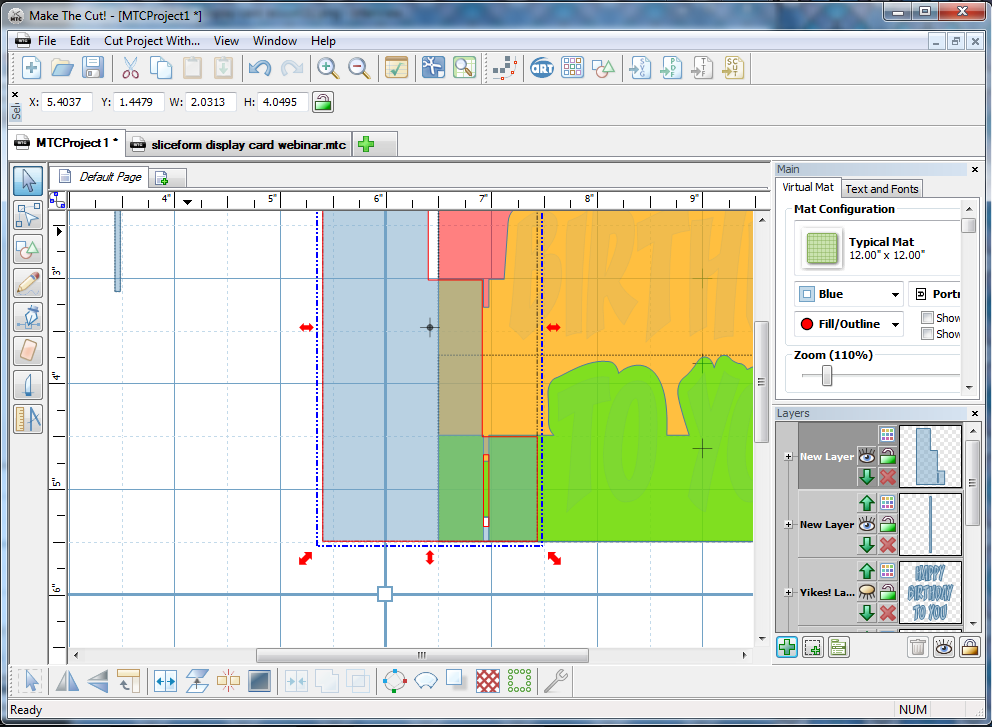
Then select all and do a BOOLEAN JOIN and pick
B to A so it looks like this (note i have had times when
A to B was needed don't know why)
Click APPLY and you have this now you can turn that one off
Selecting the next three pieces for each layer the wording
shadow and the two lots of rectangles on the sides that
match. select both the rectangles and do a join .
Then select all and do a BOOLEAN JOIN and pick
B to A so it looks like this. Click APPLY and then turn that one
off
Selecting the last three pieces for each layer the wording
shadow and the two lots of rectangles on the sides that
match. select both the rectangles and do a join .
Then select all and do a BOOLEAN JOIN and pick
B to A so it looks like this. Oh and now i made them
each a seperate colour and made them in order of
layers from Happy on bottom to To You on top
so it is easier to see
Now you need on a NEW LAYER a rectangle the same
height as the side of your back shadow and 0.5" wide
lined up with the bottom of the card.
With this selected COPY and PASTE IN PLACE twice so
you end up with three
You then move the middle top arrow of one of them
so as it is the height of the to you layer
And the other down till it is the height of the birthday
layer
The tallest one you now make that 1" wide
Using the arrow keys you now line all them up
so they are side by side making the two littler
ones wider now so they over lap.
Select all three
And do a weld
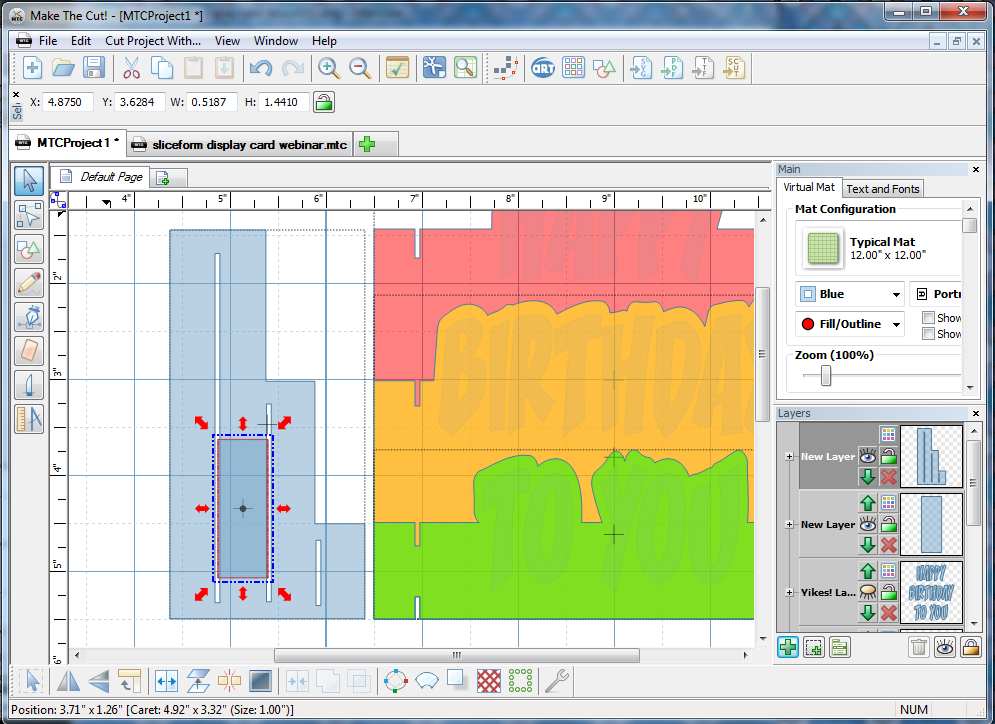
Using the arrow keys line this up so the side of the first step
lines up with the slits of the cards (click on this picture to see better)
the rectangle you have to the side do a copy and paste in
place and now move it over to the slits
and having it slightly lower than the top of the layer slit
Then using the arrow key to adjust the height down
till it is just above the bottom of the top slit
NOW do a COPY while that rectangle is selected
Select both that rectangle and the side step card
and do a JOIN
Then move the side step card over so the Birthday layer slits are
alined up like this
Now do a PASTE IN PLACE and adjust the height of
that with the red arrows so it is just above the bottom
of the top slit (click on picture to get better look)
NOW do a COPY
Select both that rectangle and the side step and do a JOIN
Now you line the biggest step up so it is half way between the
happy shadow layer
Do a PASTE IN PLACE and then use red arrows to
adjust the height
Select that and the step card and do JOIN now move
to the side where you can work on it
Now to make this all easy to put together after cutting
what we do is make a retangle between the slits
still leaving enough slits on the middle layer. Like this
And one like this between the next two like this
Select all of them and BREAK APART
Then select all 5 middle pieces and do a WELD
Then select them two and do a JOIN
We need two of them COPY , PASTE IN PLACE
and MIRROR. Finished now
You now arrange them on your mat how you would
like them
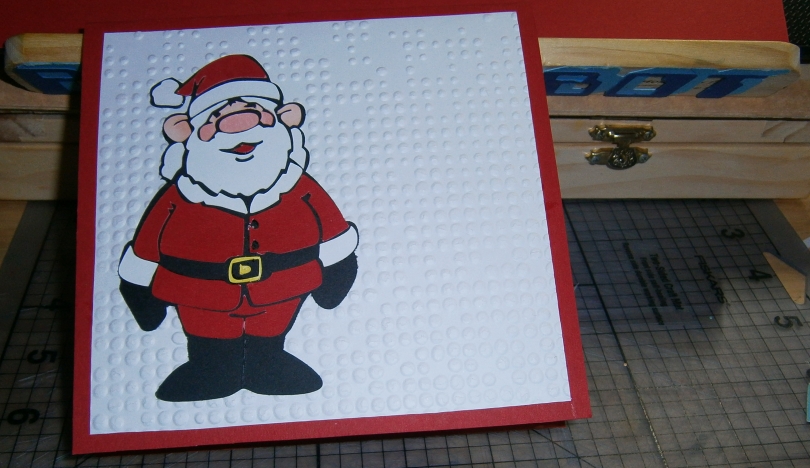
Here is the finished card Instructions on how to put
Folds Flat for posting
It does not end there!!
NOW it does get addictive once you have
made one you will have the idea and you don't just need
paper piecing as well
Be creative and you will have lots of WOW cards
Enjoy yourself don't be afraid .
Also you don't need to stick to just 3 layers
some of mine are 5 layers it is up too you and you can
also have them more or less than 0.5" apart depends
oh how you want it to look
Please let me known what you think.
Enjoy
I am off to explore some more.
If you live in Australia and New Zealand
and wondering where you can get a KNK Zing