Scrap Factory Expanaion Packs

Friday, September 07, 2012

LD Robots inside outside card (as seen in Webinar 4th/5th September 2012)

Here is another sample of the INSIDE OUTSIDE card
like i demoed on the Webinar. This time I used the 
Lettering delights robot and also used the cuttlebug 
to emboss the main part of the card.


Other samples 

Look out for the webinar posting in the next couple of days 
to see how this pattern was made .
I will try to make a lesson for blog in time 
 
I am off to  explore some more.
 If you live in Australia and New Zealand 
and wondering where you can get a KNK Zing 
SKAT KAT  is the place to find them
 

Thursday, September 06, 2012

Fun in the Sun inside outside card (as seen in Webinar 4th/5th September 2012)

As you can see by the title that I have done another demo 
in the Make the cut webinar this week . This time I did 
an INSIDE OUTSIDE CARD .
Here is a sample using an Alota Rubber stamp


Look out for the webinar posting in the next couple of days 
to see how this pattern was made .
I will try to make a lesson for blog in time

Wednesday, September 05, 2012

INSIDE OUTSIDE card (as seen in Webinar 4th/5th September 2012 )

As a child I had one book that I knew of by heart 
and I can still remember the words to it .
These cards always remind me of this book.
Today I demo'ed in the webinar again and Showed this 
INSIDE OUTSIDE card.

If you would like the Make the Cut file 
and here is how to put it together after you have 
cut all out

I used Yikes and AEZTurtles Fonts  from Dafont


I am off to  explore some more.
 If you live in Australia and New Zealand 
and wondering where you can get a KNK Zing 
SKAT KAT  is the place to find them

Tuesday, September 04, 2012

Fathers day to the moon!

Fathers day in Australia was this past Sunday
While surfing the net last month I came accross  this wonderful Queen of hearts rocket and really liked the shape But wanted to cut and emboss it on my cutter so I got the pdf file and started 
Well it is not the sort of pdf that can be handled in Make the cut  so I nearly gave up then I decided that  I really wanted to make it so I then went to inkscape and hand traced the pieces and got it into something  that i could finally use in Make the cut (not a quick thing to do but I am happy I stuck with it )  and cut it on the zing and then ran through the cuttlebug
I added automobile pin striping on the rocket and chair .
Changed the queen to a BLUE ROBOT
The lid comes off
and there is a seat inside
Just fits the bluerobot
Snug in side to go to the moon

Monday, September 03, 2012

Halloween Challenge No 90 over at Alota

All you have to do is create a card/project and upload it to your blog and/or to a online gallery using the keyword Alota90. You don´t need to use stamps from Alota Rubberstamps but we love to see them if you have any!

Don't forget to ALOTA BLOG and link it on Inlinkz so that everyone else can see it too.
I hope you have fun with the challenge. You have til the September 15th. to complete this challenge, you can enter as many entries as you wish for a better chance of winning!!! The winner is selected randomly from all the entries received.


Saturday, September 01, 2012

50 YEARS so something extra SPECIAL

Today was Neal's Aunty and Uncle's 50th
Wedding Anniversary and over the past couple of 
weeks i have been working on this Special 
present for them. It is a 3D book card with extra
pages in it .
My plan was to use only the two colours all the way 
though it , even though at times i had to think how i was 
going to do things with just the two colours
The gold metalic card cut soo nice on the zing 
I was soo happy as i had lots to cut


I picked two things from there time together 
a cow as a dairy farmer and Aunty Jo has 
an arts degree
This page of Great Grandchildren has 
to have a girl added to it as she has JUST been 
born. (I cut one of each for them to choose which one
they needed to put in )


I am soo pleased with how this turned out and I 
know that they will love and treasure it .

Used many fonts and the Zing to cut all pieces out 
and cuttlebug to add some demention to each page

Hot Air Balloon 3D book Card

I think the reason I love these 3D book cards 
is they make good gifts and you are not limited to 
flat things on the cards. For the cover of this one 
I cut out lots of hot air balloons and then glued them 
all on top of each other to make  my own chipboard balloons
Used white copic paint to do the clouds 
(which also hid some huge mess from other 
clouds that did not work)
Did the pages of this book read as I love 
a set of books that my son has that the pages have 
red edges
I made a Half a 3D hot air balloon and glued it in place
and the other 2 balloons are several balloons folded in 
half and glued together
I added a bit more strips of green between the mountains
to make cover the red and blend into the book
Although i don' use torn card very often I 
do like using it for hills and sand
Would love to hear what you think of this 
Thanks for visiting

Friday, August 31, 2012

Wednesday, August 29, 2012

Round boxes (as seen on Webinar 28th August 2012)

Here is a quick and easy way to put together a Round
box.
Make the Cut pattern HERE
LETS BEGIN
When designing it I put the base to the right and the lid to the 
left . To make the base I take the top side pannel on the 
right of the mat and the very right circle
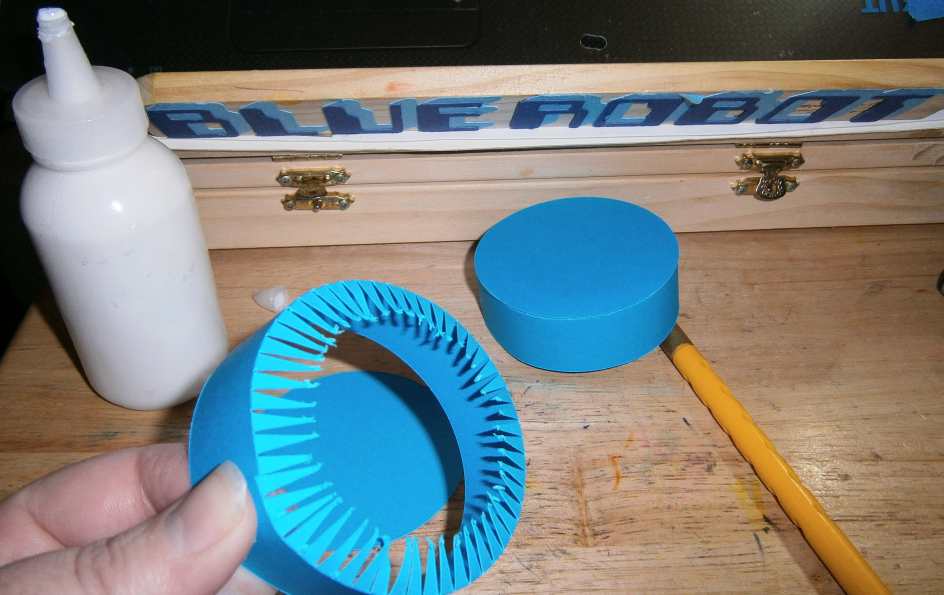
Fold the tabs in at the score line and with your fingers 
give the side some shape
Now glue and the end tab (when making lesson I did not 
allow mine to dry before letting go )
Now put glue aroung the Edge of the circle piece
And place it face down in your side of the box 
(protect your work surface with some
 backing paper of something (I didn't) )
now push around the edge with your finger 
all way round
Turn it upside down
Now add the second circle to the right of the mat to the 
bottom of that
And you have your base of your box made
You are left with these on your mat
take the side strip and right circle
and fold the tabs and shape the side with your fingers
join side into a circle
drop the circle with glue all around edge in face down
push down well
turn over and get the last circle of mat
And add to the bottom of base
Finished your BOX
Lid fits well
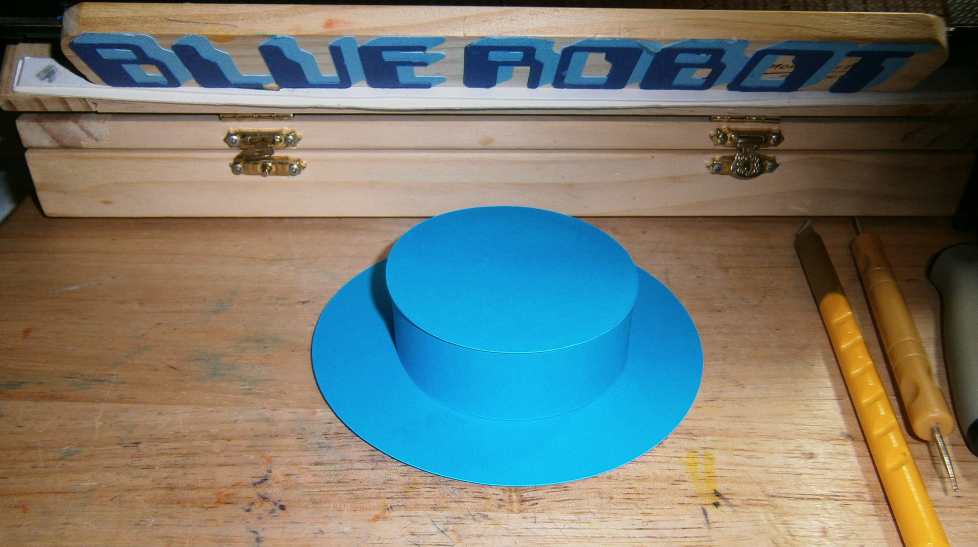
Adding a bigger base to box you now have a 
hat shaped box

add ribbon and bow
Oh and this idea can be not only for round boxes 
but can be oval boxes as well
You can make the wall of the lid  shorter if you like too