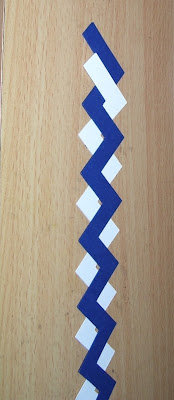
Week Six with having fun with the ZING
This time I thought i would revisit a lesson i had on my blog years back as I really love this idea. Gives a great look to your project
Cut pattern out in two contrasting colours

lay them together (you can see that i have the white one behind but the top of the white is on the top of the blue.

Now holding the top wrap the blue to the back (you will notice that the first four zig zags are now in place)

Now you wrap the white to the back of the blue

Then the blue to the back and you will see the magic appearing

and the white to the back

Continue till they are both intertwined with each other

and here is the finished piece
 SEND ME AN EMAIL if you would like a copy of the svg file for this ZIGZAG
Here is the card I made this time with the idea

lay them together (you can see that i have the white one behind but the top of the white is on the top of the blue.

Now holding the top wrap the blue to the back (you will notice that the first four zig zags are now in place)

Now you wrap the white to the back of the blue

Then the blue to the back and you will see the magic appearing

and the white to the back

Continue till they are both intertwined with each other

and here is the finished piece
 SEND ME AN EMAIL if you would like a copy of the svg file for this ZIGZAG
Here is the card I made this time with the idea
Cards i have done in past with ZIG ZAG
TIP
If you find you are getting a slight tear when the Zing begins each cut THE REASON your blade is out of the housing too far
(learnt this the hard way )
I am of to explore some more.
If you live in Australia and New Zealand
and wondering where you can get a KNK Zing
SKAT KAT is the place to find them


Great Idea! cant wait to try it!
ReplyDelete