So much trial and error to get sure cuts a lot to
cut a single line with out any stray cuts of in the
wrong direction. I remember my first pop up
pattern I ever made was nearly going to be my last
for this very reason. A year ago I shared many
pop up patterns i had that did cut right, only cause
I found out the trick to it. Since that year has passed I
have discovered lots of neat tricks to make it even
easier. And today being the start of June 2009 I am going
to show you the easier way to make any pop up card,
THAT WILL CUT RIGHT IN SURE CUTS A LOT


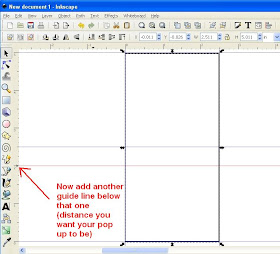
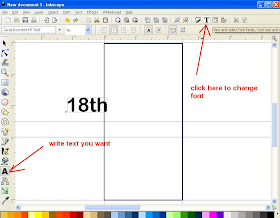
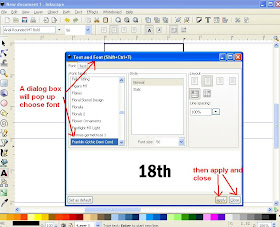
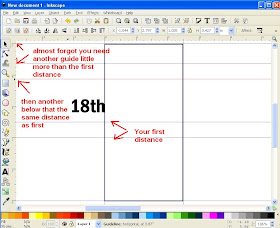
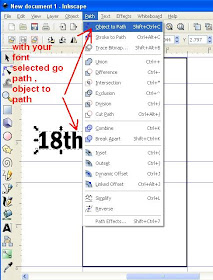
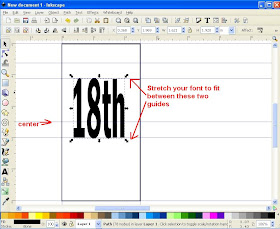
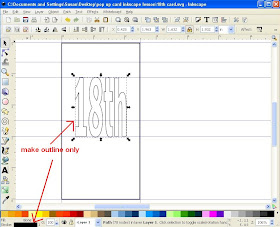
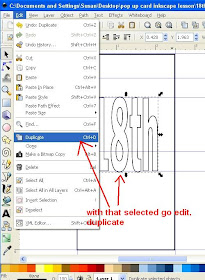
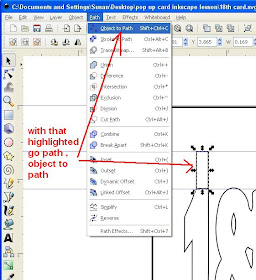
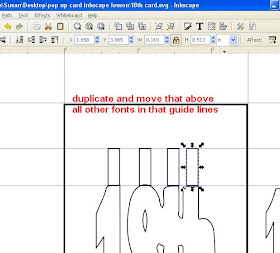
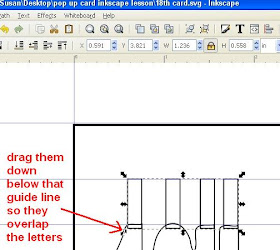
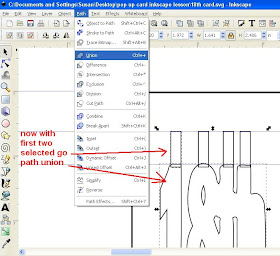
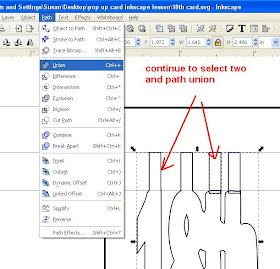
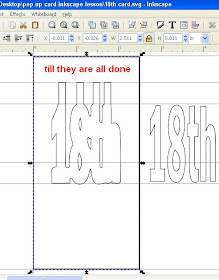
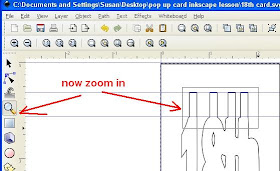
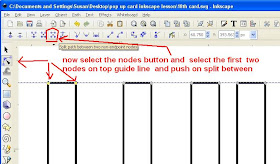
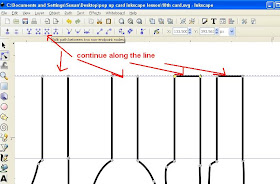
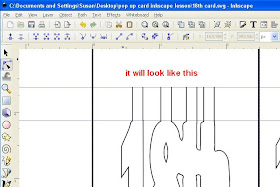
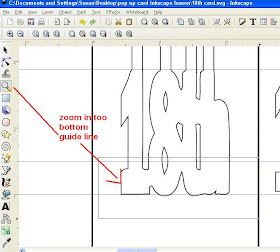
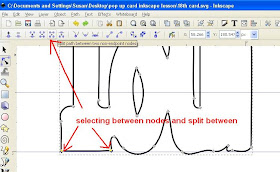
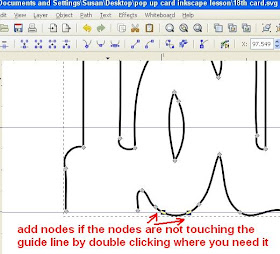
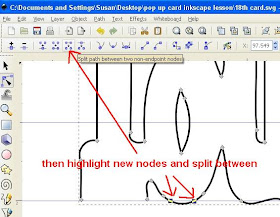
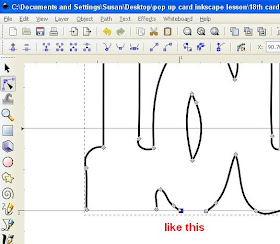
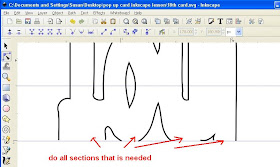
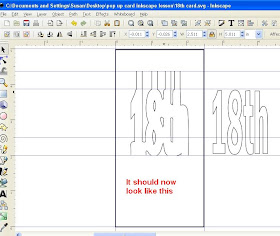
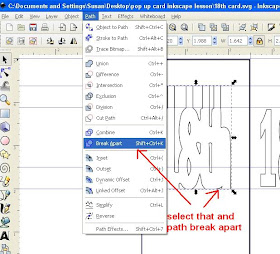
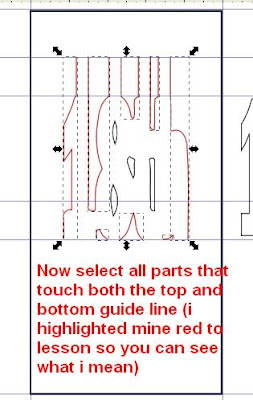
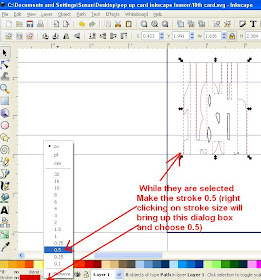
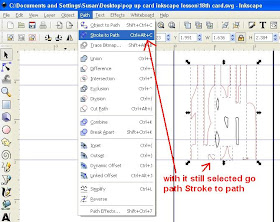
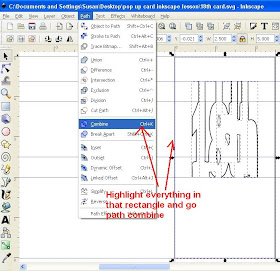
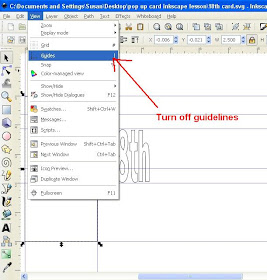
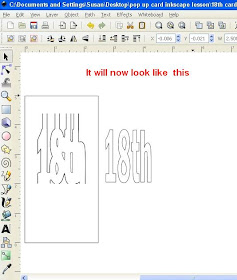
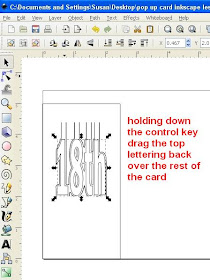
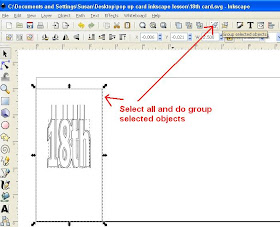
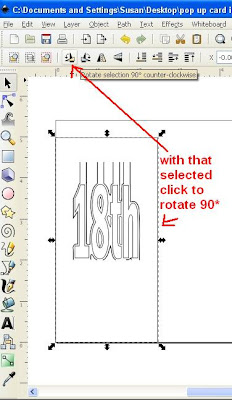
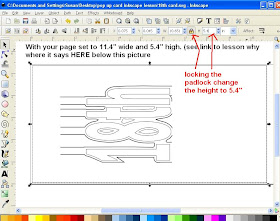
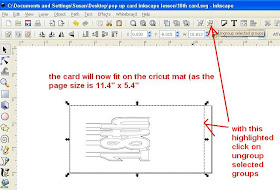
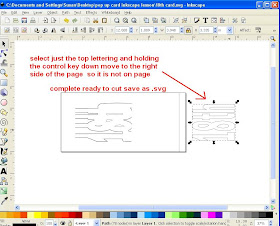
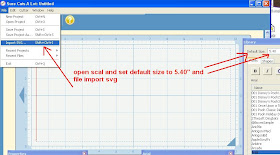
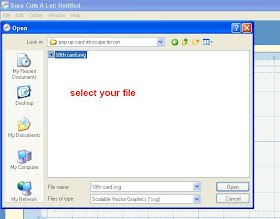
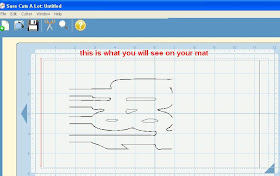
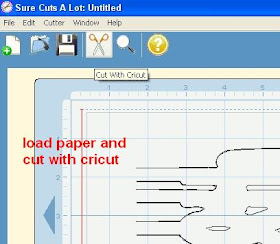
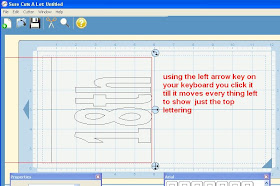
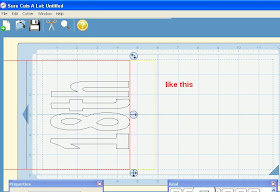
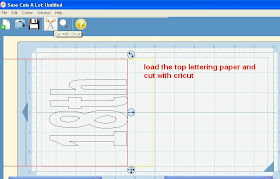
Hope you have found this useful and would love to
hear from you .
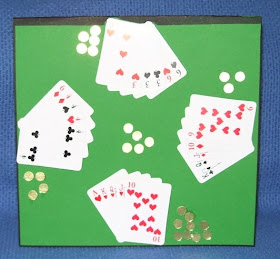
I used a small deck of store brought cards to make the
front of the card.
And for the lettering on the inside of the card I
i cut them from a large card set of store brought
cards.


WOW! Your tutorial is amazing! You are so generous of sharing with us the hard work you have put into this.
ReplyDeleteThank you Thank you Thank you
ReplyDeleteI have been trying ang trying to make pop up cards
This wonderful. I have always wanted make one of these types of cards. Thank you so much.
ReplyDeleteIt´s great - Thank you so much!
ReplyDeletelg Ingrid
Beautiful and well thought out tutorial! Thank you for sharing!
ReplyDeleteEnjoy!
Chris
What a great lesson! Thank you for sharing it with us. You certainly make our time on SCAL a lot easier.
ReplyDeleteGreat work as usual, Susan. I'd love the file since my son will turn 18 in a few weeks.
ReplyDeleteThanks,
Cathy
clstmbgh@comcast.net
Great Tutorial. Will have to save and print it out for later. You are my inspiration for learning Inkscape.
ReplyDeleteAnother great tutorial. Thank you for your time and generosity.
ReplyDeleteLinda
WOW! I've said it before and I'll say it again, "YOU are the BEST!" Thank you so much for all your hard work and for always so generously sharing. I have learned SO MUCH from you. I am eternally grateful!
ReplyDeleteThank you for sharing this info. Susan. I appreciate all the hard work and time you put in to figuriing things out and THEN taking the time to do tutorials, examples, etc. IT's A LOT OF WORK I know! I have saved to figure out at another time. Thanks - MeFlick form Cricut MB
ReplyDeleteThank you for sharing. I miss you on the Surecutsalot group. :(
ReplyDeleteSusan I used you tutorial on how to make paper rose and the pop card one. I made a love card with the rose on te front.
ReplyDeleteI hope you like it. The link to my blog is
http://celestelombas.blogspot.com/2009/07/paper-rose-love-pop-up-card.html
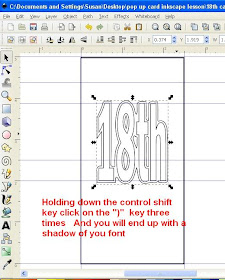
I am trying my hand at this but can’t quit get it. I am very new and this is my first try at anything like this so I am sure it is all me but I can not get the part that says “holding down the control shift key click on the “)” key three times and you will end up with a shadow of your font. Well I just don’t get a shadow, in fact nothing happens. Any idea what I am doing wrong?
ReplyDeleteThanks for any help you can give me and by the way …..I just love your blog. Thanks
Hi, Susan! Thank you so much for this tutorial! I have been trying to do pop-up cards in Inkscape, and couldn't quite make it. This is really a huge help!
ReplyDeleteTrisha
That is great!! Thank you!
ReplyDeleteThank you so much for making this tutorials (and wow, I'm blown away by your list posted on www.cricut.com of your other tutorials)! My son turns 18 this July so I cannot wait to make this ... did I say thank you!?
ReplyDeletePERFECT!! I tried this today and it turned out perfectly! Thank you SO SO SO much! Adds a whole new dimension to my "repertoir" (-:
ReplyDeleteTip: for Firefox or Chrome users: go entirely thru this tutorial and open EACH picture (step-by-step) in a new tab. Then, it's easy to click on a tab (step one), go to Inkscape and do that step. When you do that step, close that tab in your browser. Flip back and forth between Inkscape and your browser and go one step (one tab) at a time and close each tab as you complete a step... it just seemed to keep it organized for me, so I didn't have to keep going back to this post to figure out where I was and what I had already done... hope that helps.
And Susan, YOU ROCK!!!
Just wanted to let you know, I posted a link to this tutorial here: http://hestiashelper.blogspot.com/
ReplyDeleteWow! Susan this is an awesome tutorial! I am amazed at the things I learn every time I visit your blog! Thank you for sharing your time and expertise so freely with all of us! It is most appreciated!
ReplyDeleteCindyS.
Susan - I didn't check to see how long ago you posted this tutorial, but I am just now getting to it. Yours was one of the first sites I ever found when I started down the Cricut/SCAL path, and I was amazed at what you were doing (still am!). Now, I am designing and selling files (sometimes - starving artist), but this...this has been causing me to pull my hair out! I have done this before, but could not for the life of me remember how I did it. ("This has nothing to do with age. This has nothing to do with age.") I went to Heather M's, Clever Someday's, and Cut Two Pieces, and none of them had a tutorial on it (at least that I could find. Then, there in my little search engine was Susan Bluerobot - good old Susan Bluerobot, my long-lost friend and mentor. This tutorial is so incredibly detailed, I can't wait to get to it, but, alas, it is almost 1 AM. (I chuckled when I saw that you had posted it somewhere around 3:30 AM! Love those late nights of working on this stuff.) I had it right until the "Break Apart" step. What? I never would have got that one. Thanks again. Sorry this is so long...I am giddy with excitement! Laura
ReplyDeleteI have been trying to do pop-up cards in Inkscape, and couldn't quite make it. This is really a huge help!
ReplyDelete5 years later... The time and effort you took back then is still helping others! I'm a stamper who just bought the Brother Scan N Cut to cut my images... I also love typography so set out to teach myself to cut font art (on the cheap using only Inkscape.) I've really benefited from your Inkscape/SCAL lessons - they're clearly explained and the screen shots clearly marked. I'll be spending a bit of time here... Especially loved this pop-up from playing cards.
ReplyDeleteThank you so much!