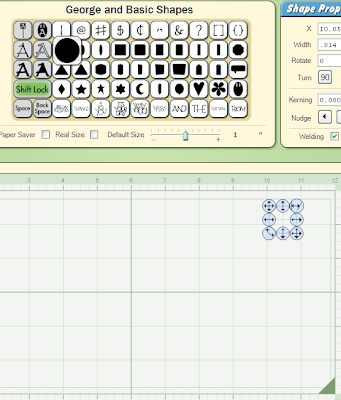
HERE is a lesson on putting scallop down one side of the card.
LETS BEGIN
What you do is add a circle to the right hand side of your mat
With welding button ticked
(NOW for this lesson i am making my circle .814
as i know that six presses of arrow key works
any other size you want will be trial and error)
LETS BEGIN
What you do is add a circle to the right hand side of your mat
With welding button ticked
(NOW for this lesson i am making my circle .814
as i know that six presses of arrow key works
any other size you want will be trial and error)

Now you copy and paste
(with design studio it will paste on top of the copied shape
so this works really good)
Now you push the down arrow button on your keyboard
I am pushing mine 6 times
(what ever amount you pick that is the amount
you use through out your design)

Continue to copy and paste after you have pushed arrow key
( copy ,paste, push 1 2 3 4 5 6 , copy , paste, push 1 2 3 4 5 6,
copy ,paste, push 1 2 3 4 5 6 , copy , paste, push 1 2 3 4 5 6,
copy ,paste, push 1 2 3 4 5 6 , copy , paste, push 1 2 3 4 5 6,
copy ,paste, push 1 2 3 4 5 6 )


I always stand amazed. You guys are great.
ReplyDeleteWhoohooo, Thank you so much! I just created, cut and saved my first thing for my Cricut using this tutorial! Thanks so much! :D
ReplyDeleteWhen I try to copy past the small hole to the right of the large the curser just jumps to the left.
ReplyDeleteThanks Joan
Yeah! it worked.
ReplyDeletethanks
barb911
Thanks so much for posting all of this great information. I have learned a lot from your posts.
ReplyDeleteLisa