2. Select it

3. Select the size you want
4. Place it and more to where you want it be on your mat

5.Select the shape cartridge that you have
6.On that same mat
7. select the shift in this case
8. I dial down to the smallest that way it is easy to adjust to sizes you need
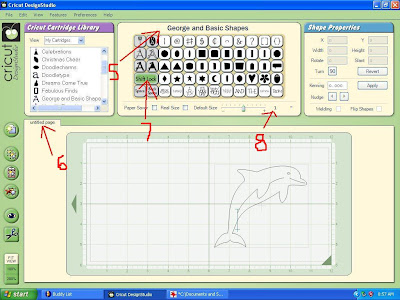
9. OK starting at one point (nose)
10. Select a shape that looks like it
11. and place on your mat
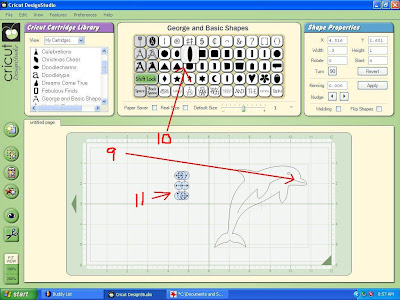
12. Move it over the part of picture and adjust it rotate it till it is in place
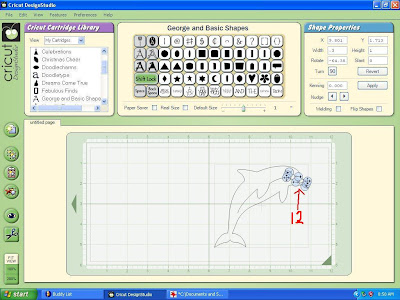
13. Next select another shape that will fit in the next part along side that piece
14. In this case the head so a circle
15. place on mat move and adjust in size rotate if need be
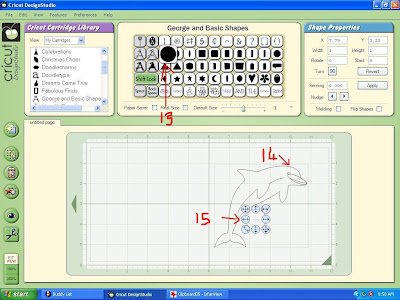
16. That is in place
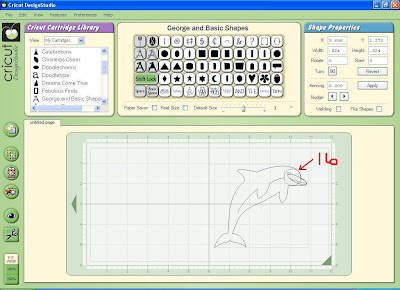
17. now if there is any little pieces that are not covered by those shapes just add another shape that would fit in there
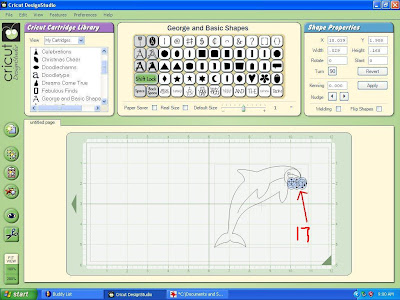
18. do it looks like this
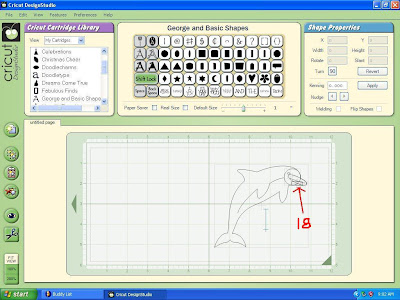
19. even picking ovals and making them bigger to fit the main part of the body helps fill in lot of the spot
20.adjusting it to fit but not go out the lines
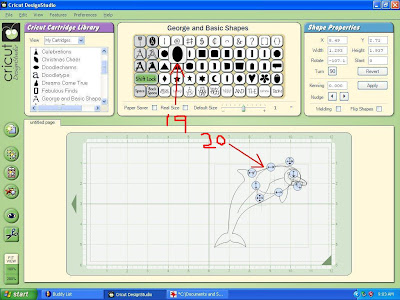
21. Again checking if there are little pieces that need filling in with other small shapes
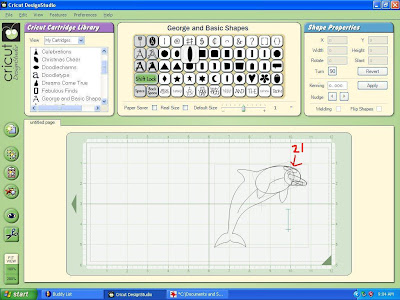
22.Keep adding shapes any shape as long as it fills and does not go out the lines
*. use the rotate , slants and other arrows to full advantage
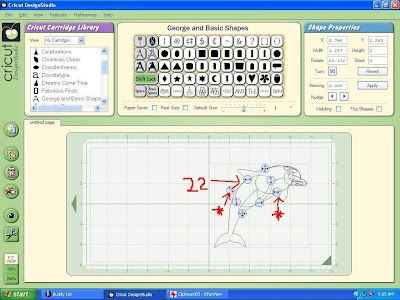
23. adding triangle shape for fin shaping it to fit in
*.use the rotate , slants and other arrows to full advantage
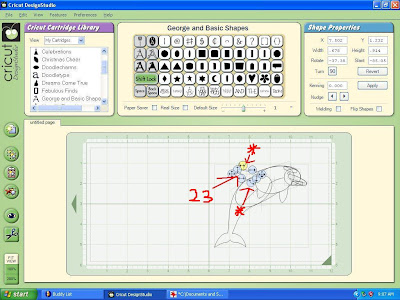
24. and any spare places that it did not fill get another shape and add it there
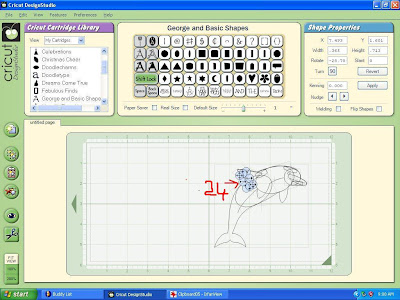
25. does not matter how many pieces you add to fill in the shapes
26. add it covers inside the lines
27. another oval for the flipper
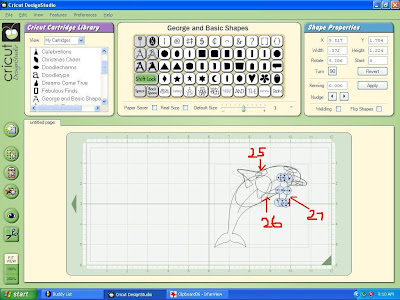
28. Continue adding till all is filled
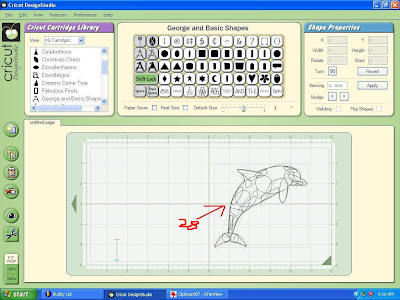
29. Copy it and then delete it .
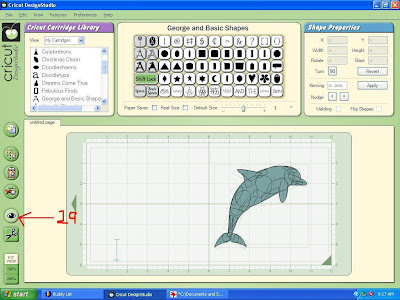
Push on preview eye to see if it looks good HIGH light the dolphin from other cartridge
30. Open a new mat
31. and past the dolphin you had copied from other mat
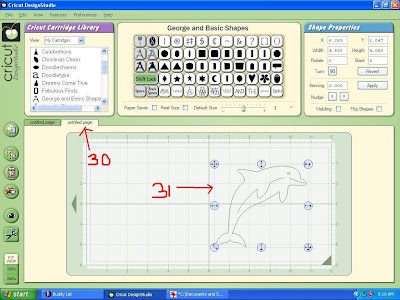
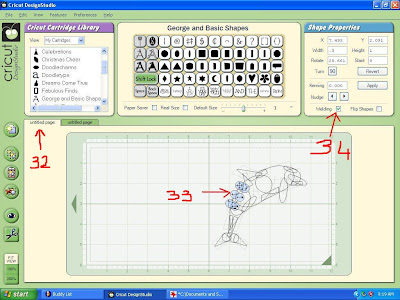
32. GO back to first mat
33.and now select each piece
34.and weld it ( the reason i don't weld till this point is then i can make sure i have ever thing in place first)
35. back to second mat (don't have this mat with preview on )
36. click preview to check that you did weld everything on previous mat (will be no colour)
37. solid line is your design so far
38. go to lettering part of cartridge
39. DO NOT WELD ANY OF THESE PARTS
40. for the flipper i choose U as it was near the shape
41. place it on mat and shrink it so the lines are thin
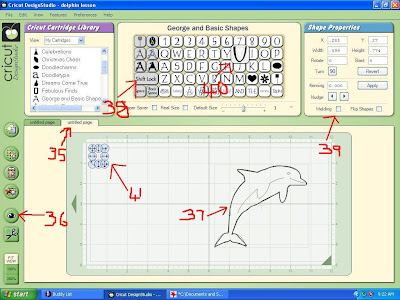
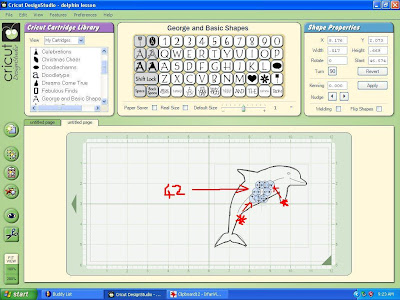
42. move into place so it fits
*. use the rotate , slants and other arrows to full advantage
43. no to pick shape for the other lines (this case it is a J)
44.place on mat and make lines thin
45,45,45. making right lenghs can be used for all these places
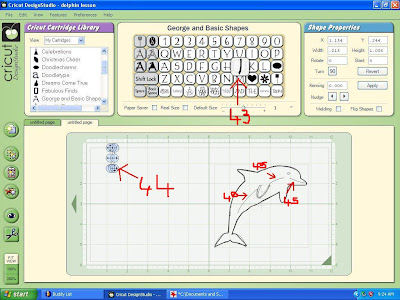
46. move first on into place and then add more for other places adjusting to right size and angle
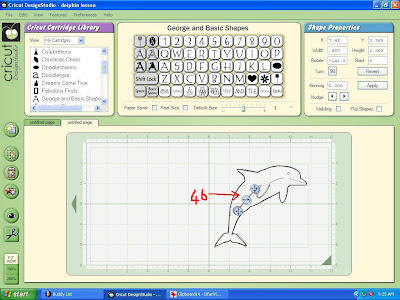
47. and for mouth same again only smaller
48. i do not have this touching the outer edge
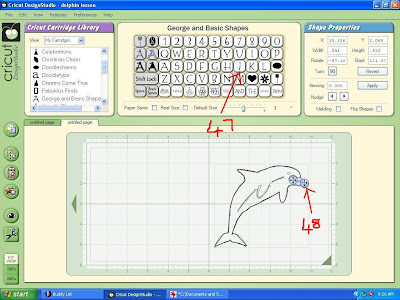
49. circle for his eye, place on board
50. make really tiny enough and move into spot
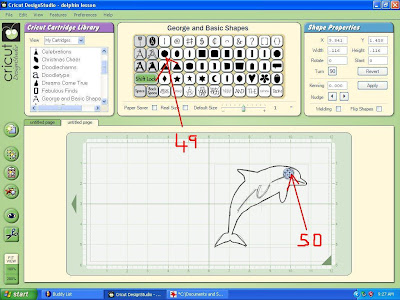
51. highlight the dolphin from other cart
52. and push delete
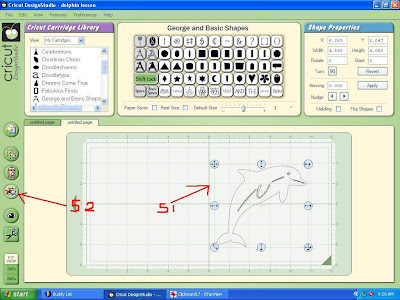
53. this is what you have left on this mat
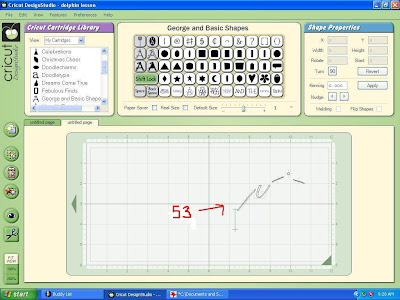
54. Now each of those pieces need to go on main dolphin on this mat each piece on at a time (meaning do one piece do lesson 55 to 61 and then come back to this mat to do next) YOU
55. Highlight
56. COPY
57. Delete
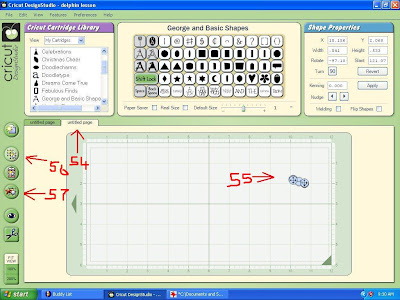
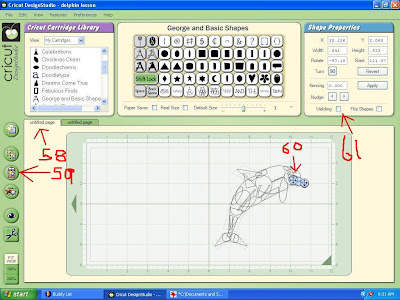
58. go to first mat
59. paste
60. it will land right where it is needed
61. REMEMBER these pieces are NOT welded
NOW go back to get next piece
62. go back to mat which should be empty
63. push preview
64. and you will see how it cuts (the markings of the design should be coloured)
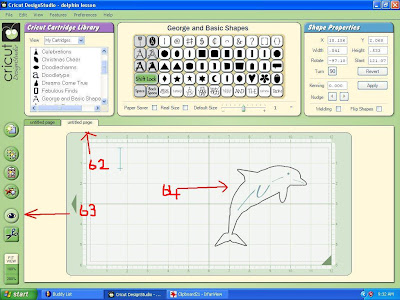
65.delete second empty mat
66.and name this mat
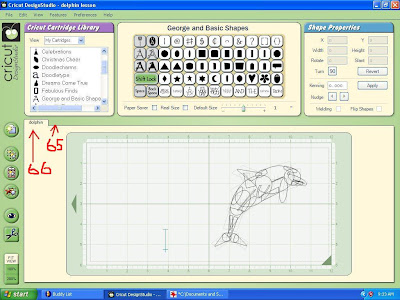
ENJOY

BRILLIANT!!!! Absolutely brilliant. Thank you for being so generous in sharing your creativity.
ReplyDeleteI totally agree with Jennifer, your lessons are great and the step by step instructions are superb, thank you :)
ReplyDeleteThank you so much!!! I have to say that I have given your lesson a try and it so works!!! I agree with the other two laides, your lessons are BRILLIANT! Again, thank you for sharing.
ReplyDeleteKenda
wow o wowo o wow!!!!!!!! thanks !!!!
ReplyDeleteI did this to create an apple, but I have a piece in the middle that is still showing to be a cut. I can only assume I have a peice that isn't overlapping somehwere? How can I get this "cut" out of the center of my apple?
ReplyDeleteThanks Susan. I have been struggling with this issue. I will try your technique
ReplyDeleteThank you for sharing this information with us.
ReplyDeleteThank you for taking your time to create all these lessons. It takes a special person to share this infomation with everyone. I have one questions, have you figures out how to cut a section from an image? Example: I have an image that has two pics on it but I only want to cut on of them. Can I seperate them?
ReplyDelete