

Many people have asked for instructions on my name book so since i was making one to have alota rubberstamped images in , i thought i would try to explane what i do hope this helps
For this book i used George cartridge (but you can use what every cartridge you wish) firstly i added in the layers i needed and named then (in this case the letter of the page of book then the colour in which i wanted to cut it out off) and selected the shadow alphebet and the default size (which in this case i am using 4 inches (which i also used on the grace book))
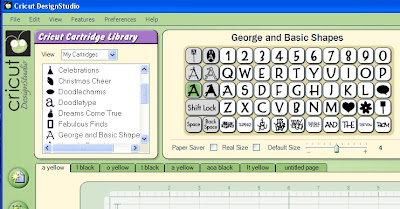
Now you add the first letter of you name you wish for your book and move it to the middle left hand side of the mat (i use the grid on the mat to make sure i am placing all letters evenly)
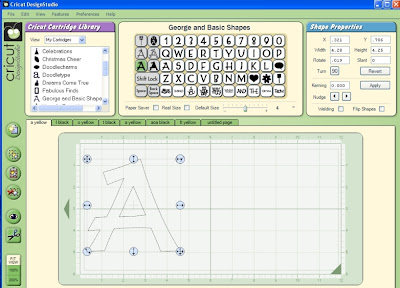
Then (with the background preview on ) move to the next layer along and place the next letter and move it to a place on the mat that looks right for the next page in your book (you can move them again when you get more put in if it is in the wrong spot)
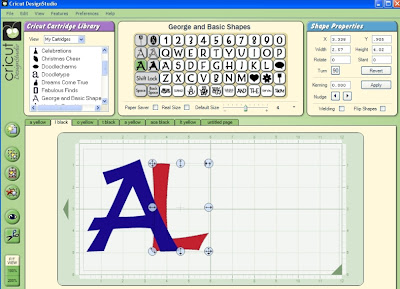
go to next layer and add the next letter of the name moving it again to where you think you would want the next letter in your book
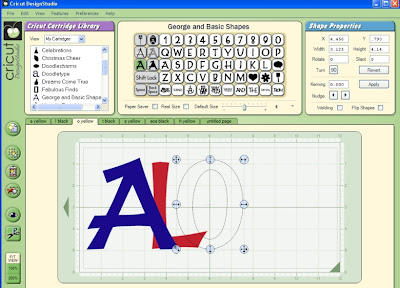
go to next layer and add the next letter of the name moving it again to where you think you would want the next letter in your book
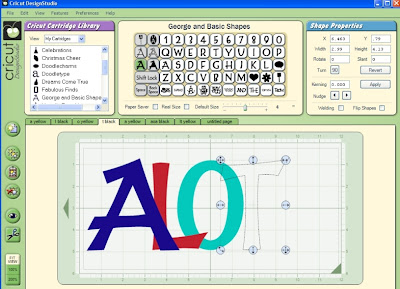
go to next layer and add the next letter of the name moving it again to where you think you would want the next letter in your book (now is where you check that the letters are as you would like them )
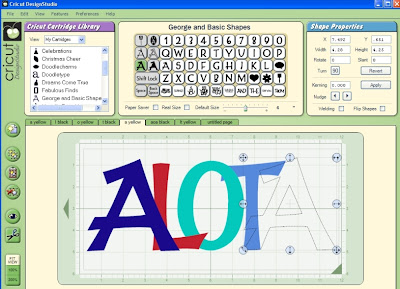
Now you go to layer one again and you push shift and you will see the shapes pick the square shape
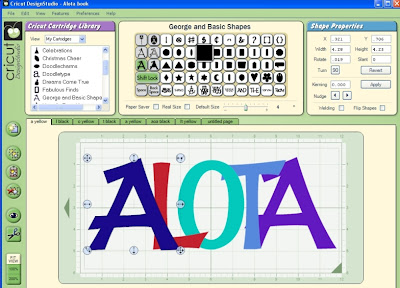 add one box and then adjust the width to sit left had side of your letter like this (i now copy this box (this way when i paste it to next layer it is in the right spot)
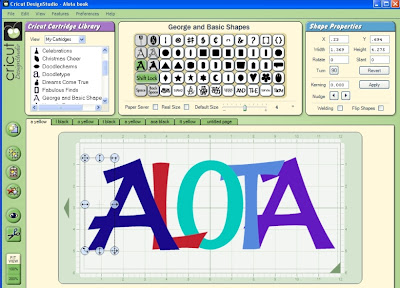
Next layer I turn the preview background off now and paste the square i copied from previous layer and just use the side arrow to adjust it to sit the left hand side of the letter
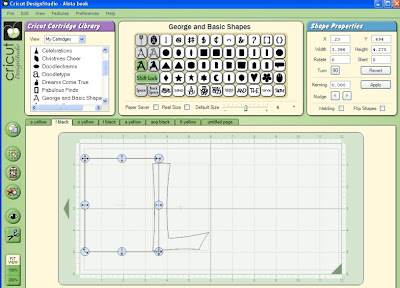
Next layer paste box and use side arrow to make bigger to sit just to the side of the letter
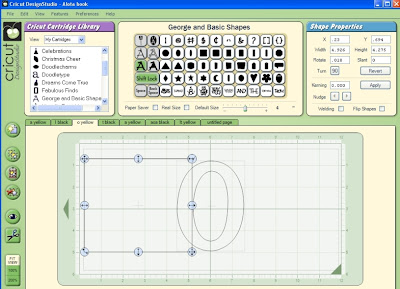
Next layer paste box and use side arrow to make bigger to sit just to the side of the letter
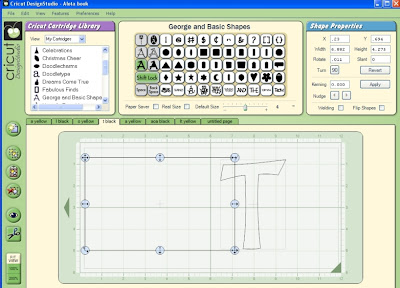
Next layer paste box and use side arrow to make bigger to sit just to the side of the letter
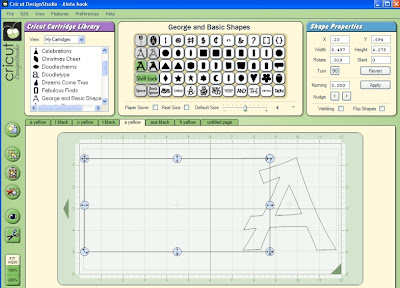
I now go to each layer select the letter and click the weld tick
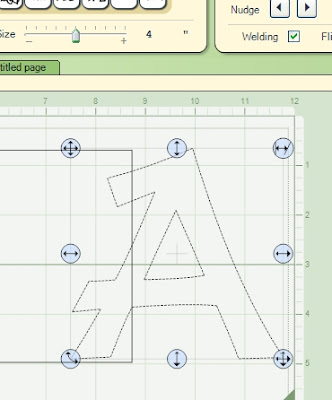
I now go to each layer select the box and click the weld tick
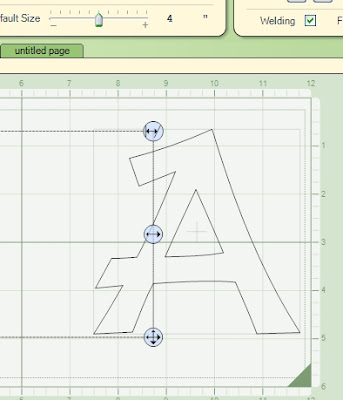
now up to preview and click the button
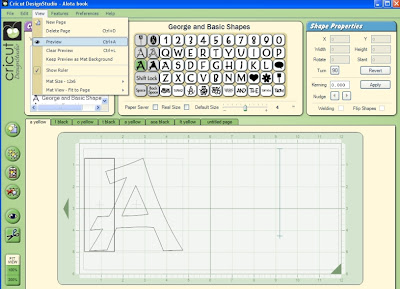
and t will show all pages , so you can get a rough idea of how it will look
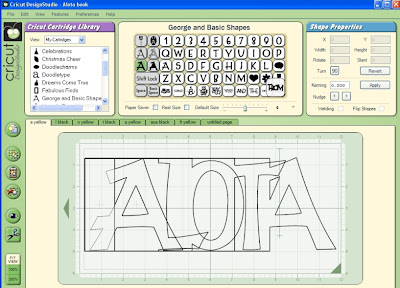
now i go to the lettering layer the these ones are going to be one colour and then i have every second letter another colour (these are the letters to go over the shadowed letters)
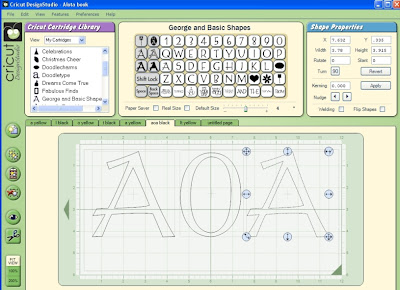
and to save paper i arrange this so it fits snug
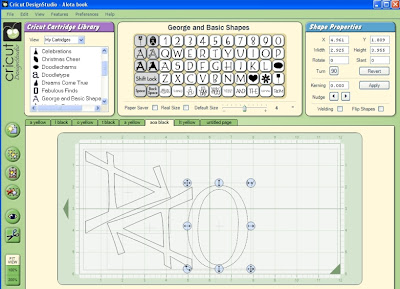
To next layer and add my other two letters
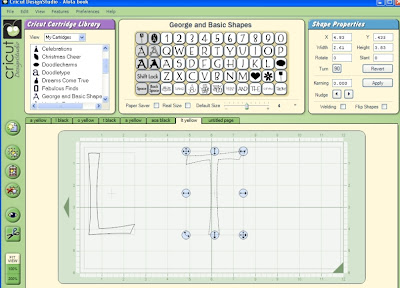
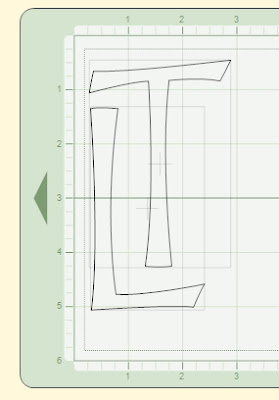
amd arramge to fit snug and save paper

Susan,
ReplyDeleteThank you!! Thank you!!
Your instructions are awesome and easy to follow.
Great instructions! I just made a book for my friend in less than an hour!!
ReplyDeleteSusan, Thank you so much. I was really apprehensive to try this. Thought it was way beyond me. But, your instructions were easy to follow & I even learned a lot about the CDS. The book was really fun to make!
ReplyDeleteSusan, I like so many others would like to thank you for all of your help. For those of us who try so hard put can't figure out DS you have been a tremendous amount of help. Thanks again
ReplyDeleteSusan!! You are so talented. I have been wanting to make a work book but could not for the life of me figure it out! Thanks to your detailed instruction lesson, I DID IT!! (Haven't cut it yet, ut I'm sure it will work fine)
ReplyDeleteThanks so much!!!
Katt
Susan,
ReplyDeleteI've made a word book with DS and another persons instructions, lots of hand cutting. This is so much easier and I learned so much about my DS. You are a very good teacher, thanks for sharing.
I have a question..I just got my ds today and practicing this name book. I got all the letters on and now doing the squares. In your demo the part where you are putting the square on your second letter. Your picture shows just the letter L and the other letters are gone. How do I do that..I did the first square..now I'm trying to do the rest and I'm lost. lol. Thank you for your help. heather
ReplyDeleteOh my gosh I have been trying to figure this darn DS out since i got it (pre-ordered in Dec!)I just made a name book in about 20 minutes - well I have to cut it out and embellish it yet ;)
ReplyDeleteThank you thank you thank you!!!!
Susan,
ReplyDeleteOh my goodness, the best inst. ever! I managed to make a name book for one my kids in less than 1/2 an hour while my six yr old was asking me to cut stuff on my left side and my 3 year old asking for a mickey on my right side, and my poor one year old playing under the table ! Thank you thank you thank you!
Thanks so much! I've had CDS for a while now, but haven't tried it. I thought the learning curve would be great. But all your lessons help out so much.
ReplyDeleteMy Letters & Boxes are not welding. Please tell me what I am doing wrong. The box cuts into the letter.
ReplyDeleteThanks so much, you make it so easy for dippy people like me. :-)
ReplyDeleteFabulous tutorial for this hot trend right now.
ReplyDeleteThank you so much!!!!!
Thank you so much Susan!! I was able to make my BABY book following your great instructions! I truly appreciate all your hard work.
ReplyDeleteThanks so much for your lessons! I've had DS for months and have never been able to figure it out. With your help, I've finally made my first word book!! I've downloaded a few of your other cut files to see how you put them together and its been a big help. Thanks for all you do:)
ReplyDeleteThank you so much Susan - I am going to try this today - I am inspired by your instructions - thank you!!
ReplyDeleteOH MY GOSH .. you are so awesome I have been wanting to make a letter book for so long. I think I am going to take a crack at it today. Noone at the swarm knew how to weld except me let alone make a book I will definetly be sharing with everyone.
ReplyDeleteThank YOu again
AMAZING AMAZING instructions!!!! THANK YOU SOOOOOO MUCH!!!!
ReplyDeleteJen
Great Instructions!!!! I've designed three since finding your directions.
ReplyDeleteI wanted to thank you for your word book lesson. I have had my machine and software for about 3 months now and am just now getting to use it (new baby has kept me from it). Your tutorial was very easy to understand. I have created 3 books to cut already! Thanks again!!
ReplyDeleteSusan,
ReplyDeleteThank you so much for the directions. They were very easy to follow and I made the first of many (I'm sure) word books.
Chris
I wanted to thank you for the lesson on the word book but I have one question. How do you get the holes on the left hand side for your rings or your fibers. I am new at this and I am trying to figure it out without having to use a wholepunch. Thank you. rachelle.barta@gmail.com
ReplyDeleteRachelle
Amazing! Thank you for this tutorial. I will immediately put it to great use.
ReplyDelete